

About This Guide
This guide provides step-by-step instructions for building an AI-powered webinar lead qualification workflow using the DigitalBPM platform, MailerLite, Gemini AI, and ClickUp.
Instead of manually reviewing webinar registrations and deciding which leads deserve immediate follow-up, you will create a workflow that:
- Captures new webinar registrations from a MailerLite subscriber group
- Uses an AI Agent powered by Gemini AI to evaluate each lead’s sales potential
- Assigns a lead score and generates a concise qualification summary
- Automatically routes high-quality leads to the sales team through ClickUp
- Filters out low-priority leads from manual follow-up, allowing them to continue through automated marketing campaigns
- Reduces response time between webinar registration and sales outreach
By the end of this guide, you will have a fully functional AI-powered assistant that automatically evaluates webinar registrations, prioritizes follow-up activities, and streamlines the handoff between marketing and sales.
Who Is This Guide For?
This guide is designed for marketing teams, sales teams, RevOps professionals, SaaS companies, agencies, consulting firms, online schools, and any organization that generates leads through webinars.
It is especially useful for businesses looking to automate MailerLite webinar registrations and improve the speed of sales follow-up. Typical use cases include webinar lead qualification, marketing-to-sales handoff automation, sales task creation, and no-code sales automation.
Why Build This Workflow?
Webinar leads lose value quickly when sales teams have to review registrations manually. Delayed follow-up often results in missed opportunities and lower conversion rates.
This workflow helps stop losing webinar leads by automatically qualifying every registrant and sending only high-potential prospects to ClickUp for immediate follow-up, while lower-priority contacts continue through standard marketing campaigns. It also demonstrates a practical MailerLite to ClickUp integration for automating the entire qualification process.
Before building this workflow, ensure you have the following ready:
- A DigitalBPM account
- A Gemini AI account with API access
- A MailerLite account with API access
- A ClickUp account
- A Microsoft Outlook account
If you’re ready, let’s get started!
Step 1: Create a New Workflow and Trigger Block
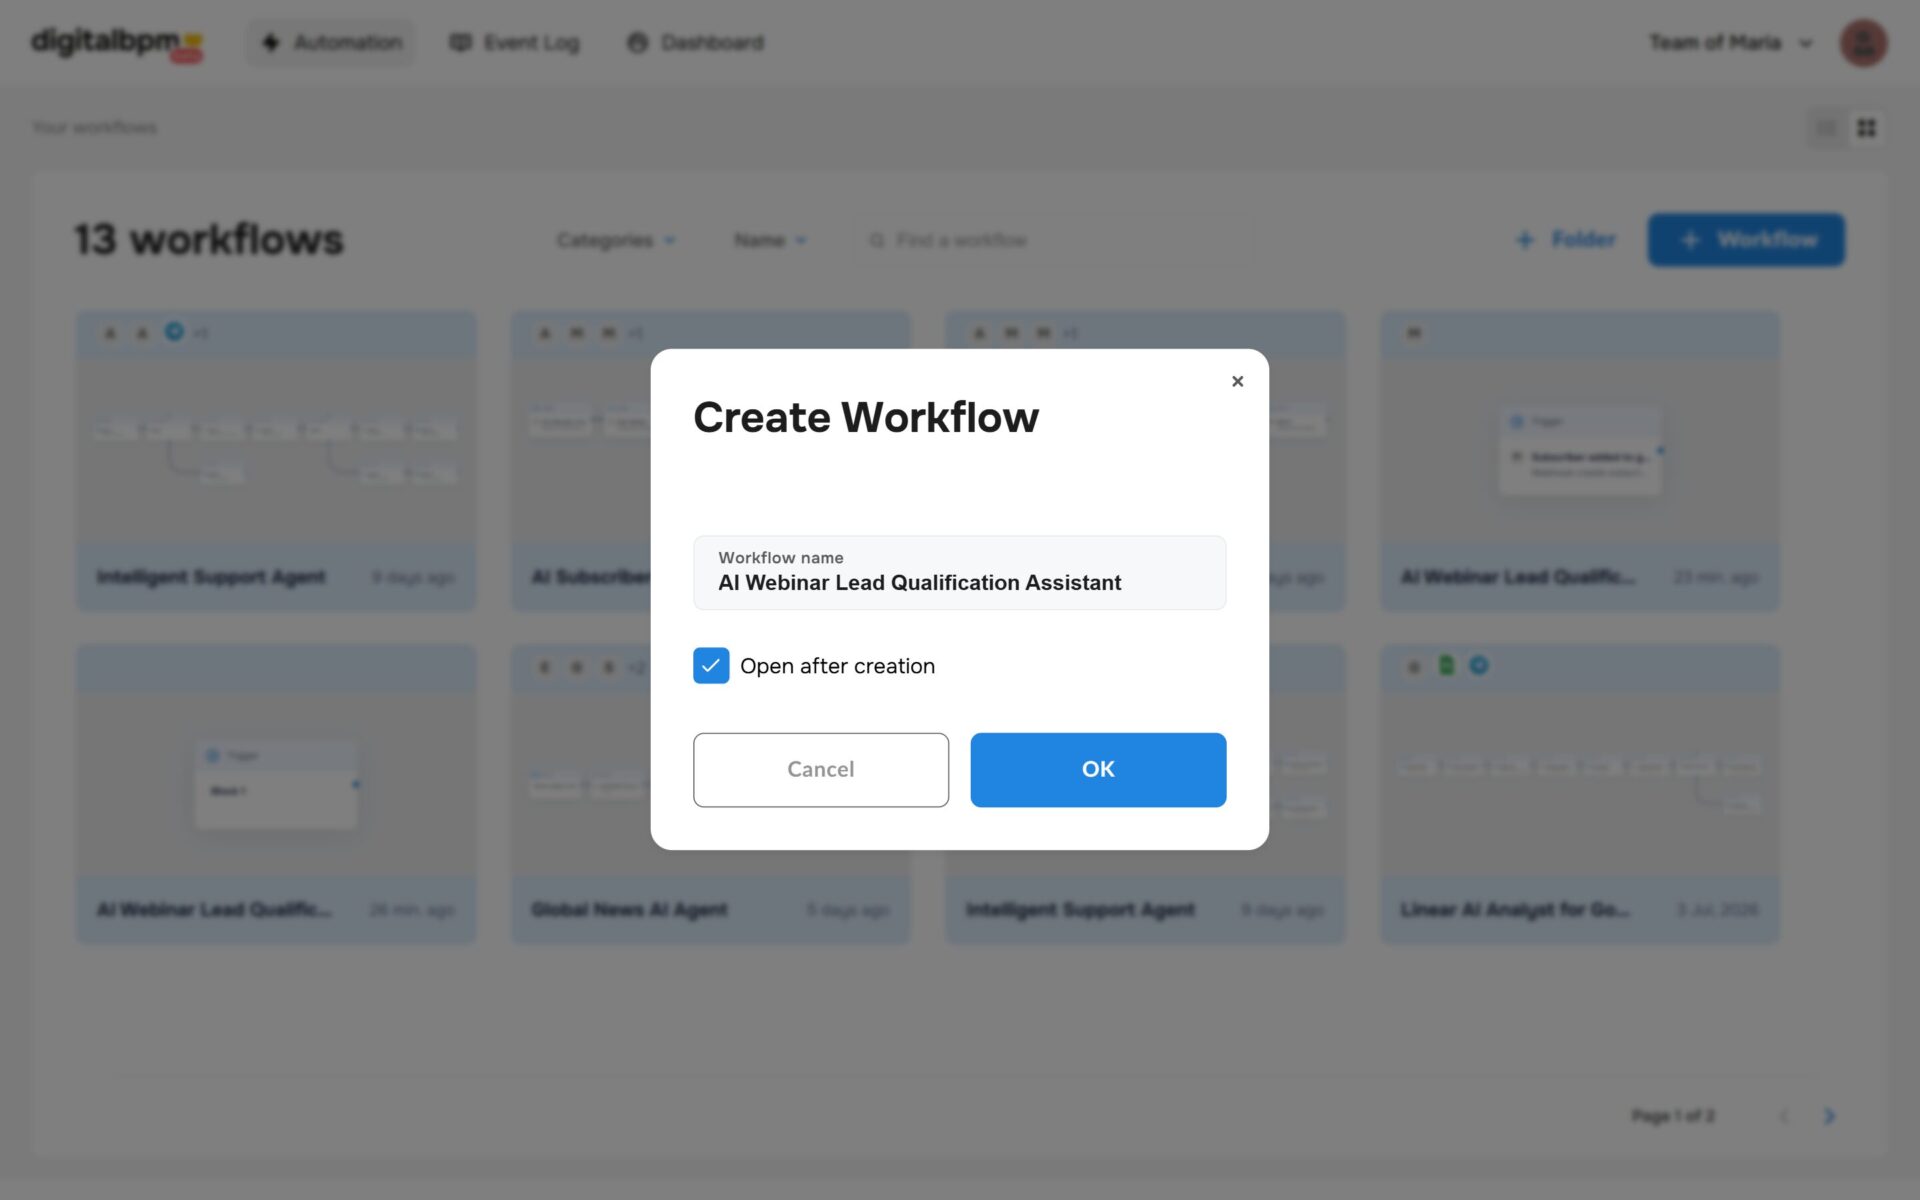
1. The first thing you need to do is to sign in to your DigitalBPM account and click on the “+ Workflow” button on the “Automation” page. Next, you need to enter a name for your workflow, for example, “AI Subscriber Onboarding Agent” and click “OK“.
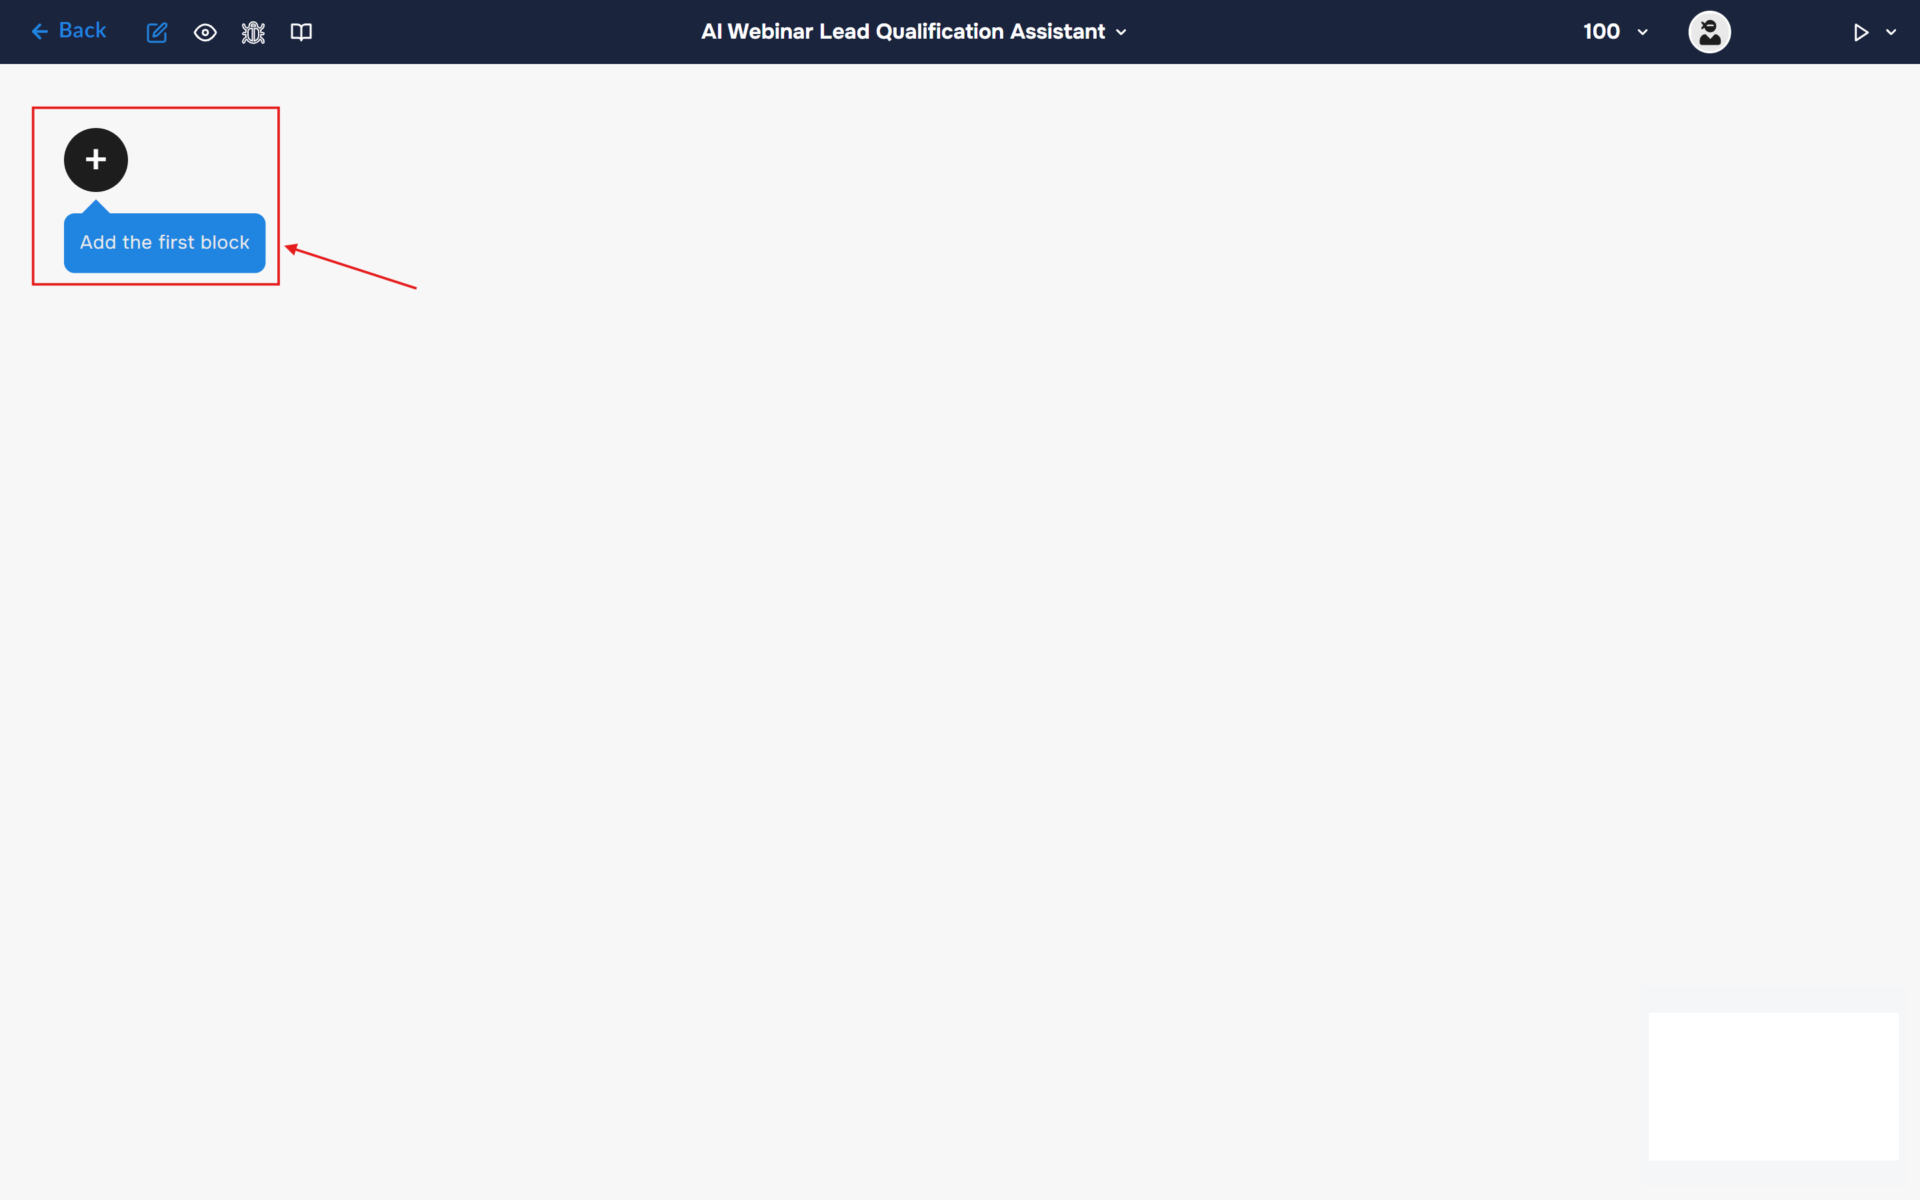
2. After confirming the creation of a workflow, its builder opens. To add the first block, click the “+ Add first block” button.
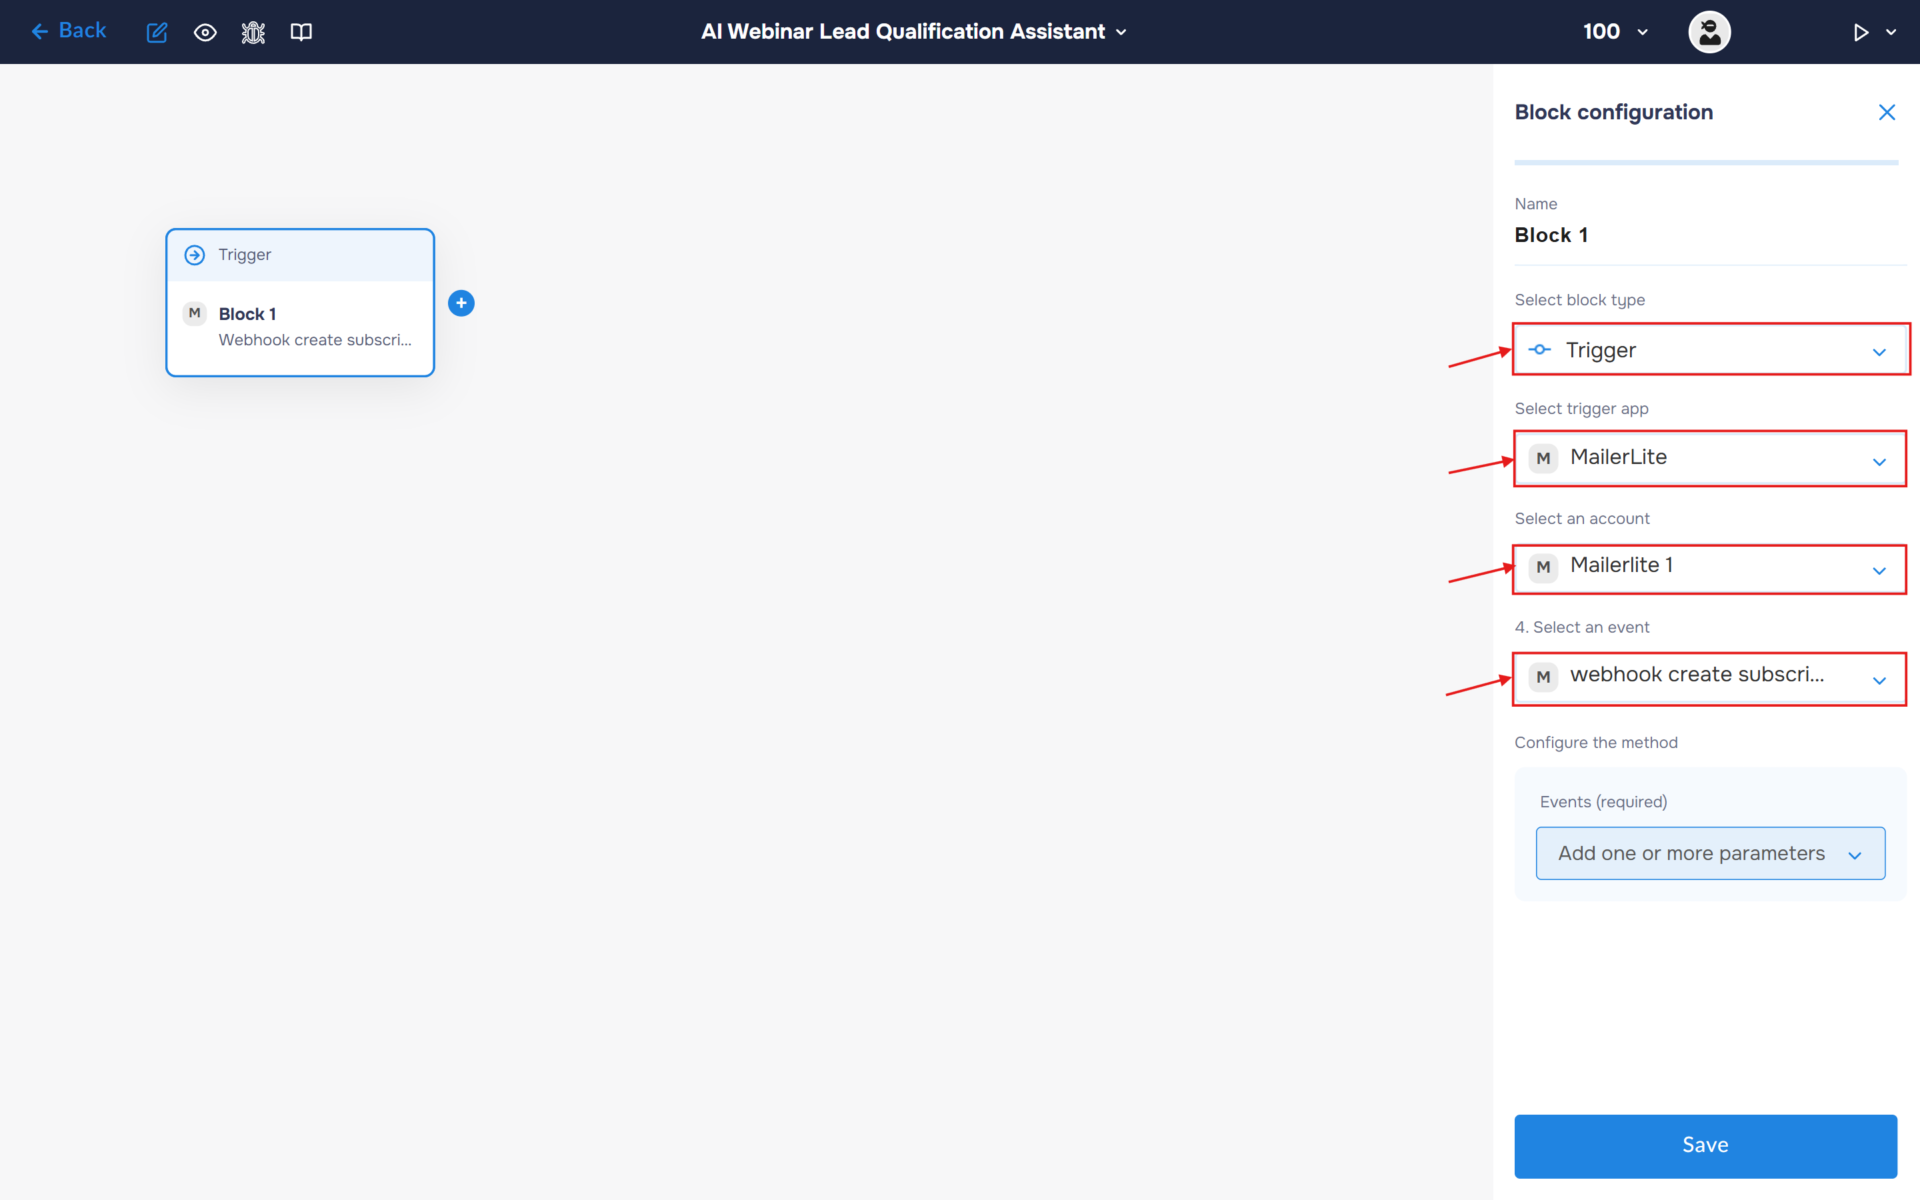
3. Next, you need to configure the first block. This block is responsible for triggering the workflow on a set trigger.
- In the “Block Configuration“ panel, click on the “Select block type“ field and select the “Trigger” type.
- Next, you need to add MailerLite service by clicking on the field “Select trigger app“; find and select “MailerLite“.
- To connect to service, you need to create an authorisation. Click on the “Sign in“ button in the “Select an account“ section.
- After clicking the button, a window for creating a new authorization will open. Enter a name for the authorization, provide the required credentials, and save the connection.
- If the authorization is successful, the created authorization will appear in the “Select an account” field. You need to select this authorization to configure the next steps of the block.
- The next step is to select an event, so click on the “Select an event“. Find and select “webhook create subscriber added to group”.
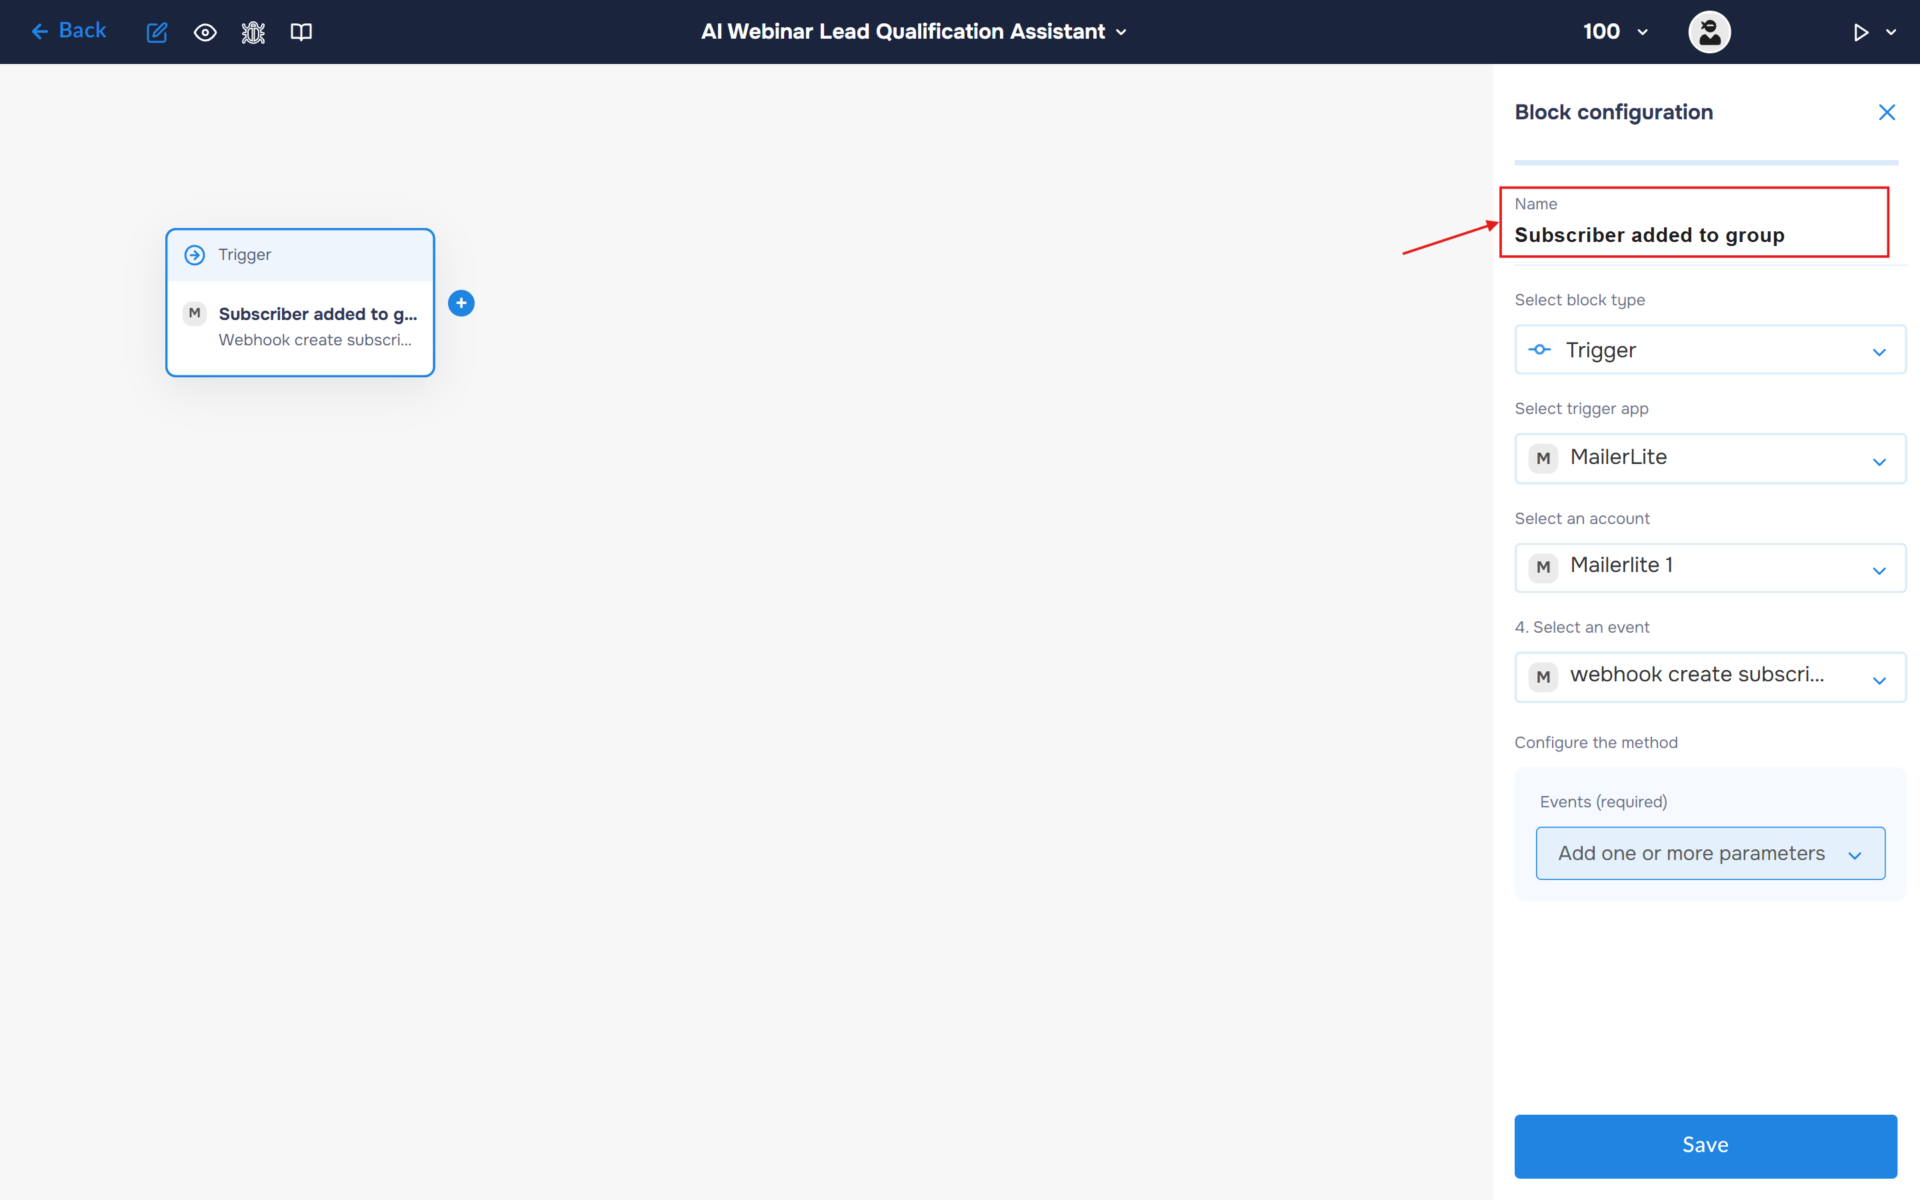
4. Click on the “Name” field and fill in a clear name for what happens in the block, for example, “New Subscriber in MailerLite”. With this step, you can quickly find out what the block is for.
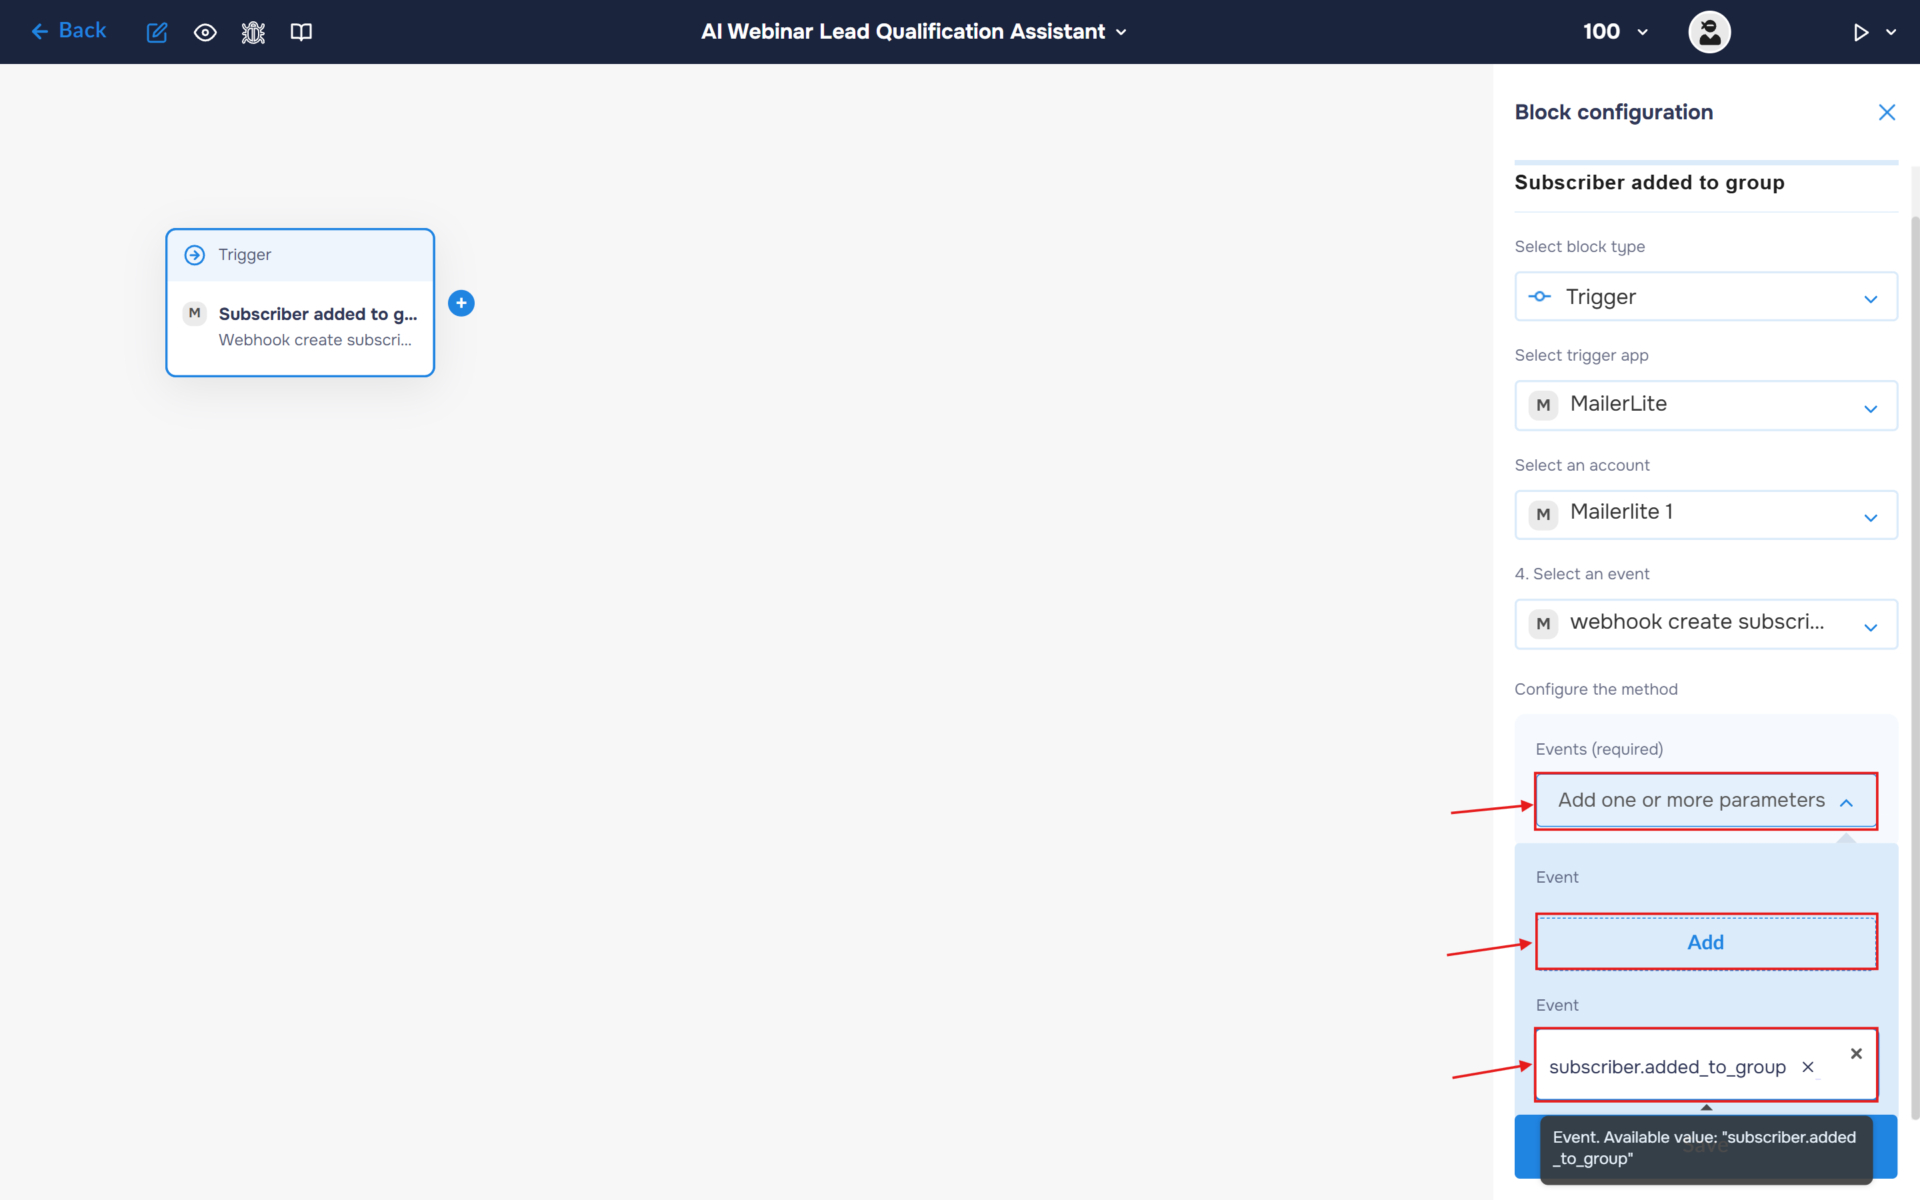
5. In the Configure the method section, select “Add one or more parameters”. Expand it and add an Event: “subscriber.added_to_group”.
Step 2: Integrate Gemini AI for Lead Qualification
1. Connect Gemini AI to evaluate each webinar registrant and determine their sales potential. The model analyzes the subscriber’s information, assigns a lead score, and identifies whether the lead is qualified for direct sales follow-up.
This qualification layer enables the workflow to automatically route high-potential leads to the sales team while allowing lower-priority contacts to continue through the standard marketing journey.
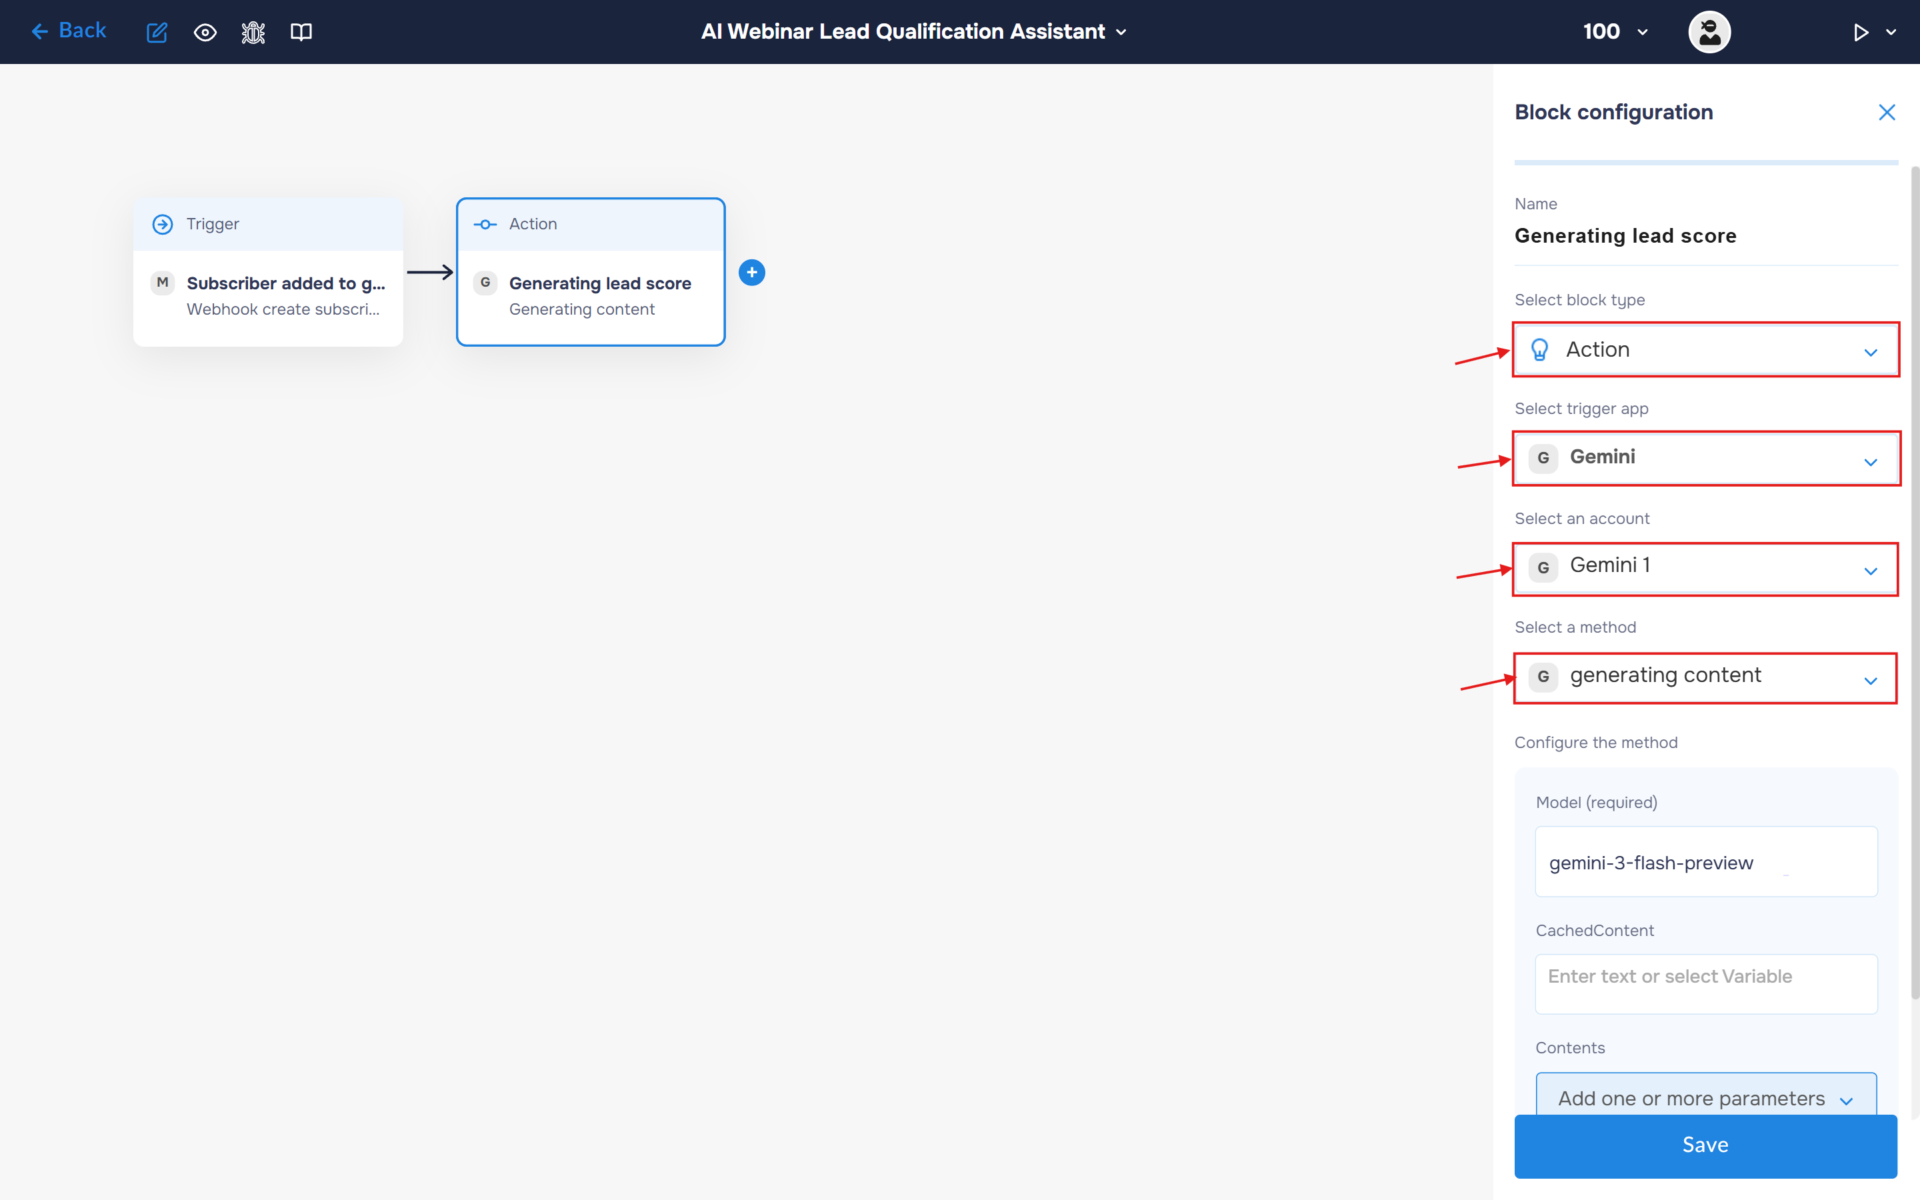
- In the “Block Configuration“ panel, click on the “Select block type“ field and select the “Action” type.
- Next, you need to add Gemini service by clicking on the field “Select trigger app“; find and select “Gemini“.
- To connect to Gemini, you need to create an authorisation. Click on the “Sign in“ button in the “Select an account“ section.
- After clicking the button, a window for creating a new Gemini authorization will open. Enter a name for the authorization, provide the required credentials, and save the connection.
- If the authorization is successful, the created authorization will appear in the “Select an account” field. You need to select this authorization to configure the next steps of the block.
- The next step is to select a method, so click on the “Select a method“. Find and select the “generating content” method.
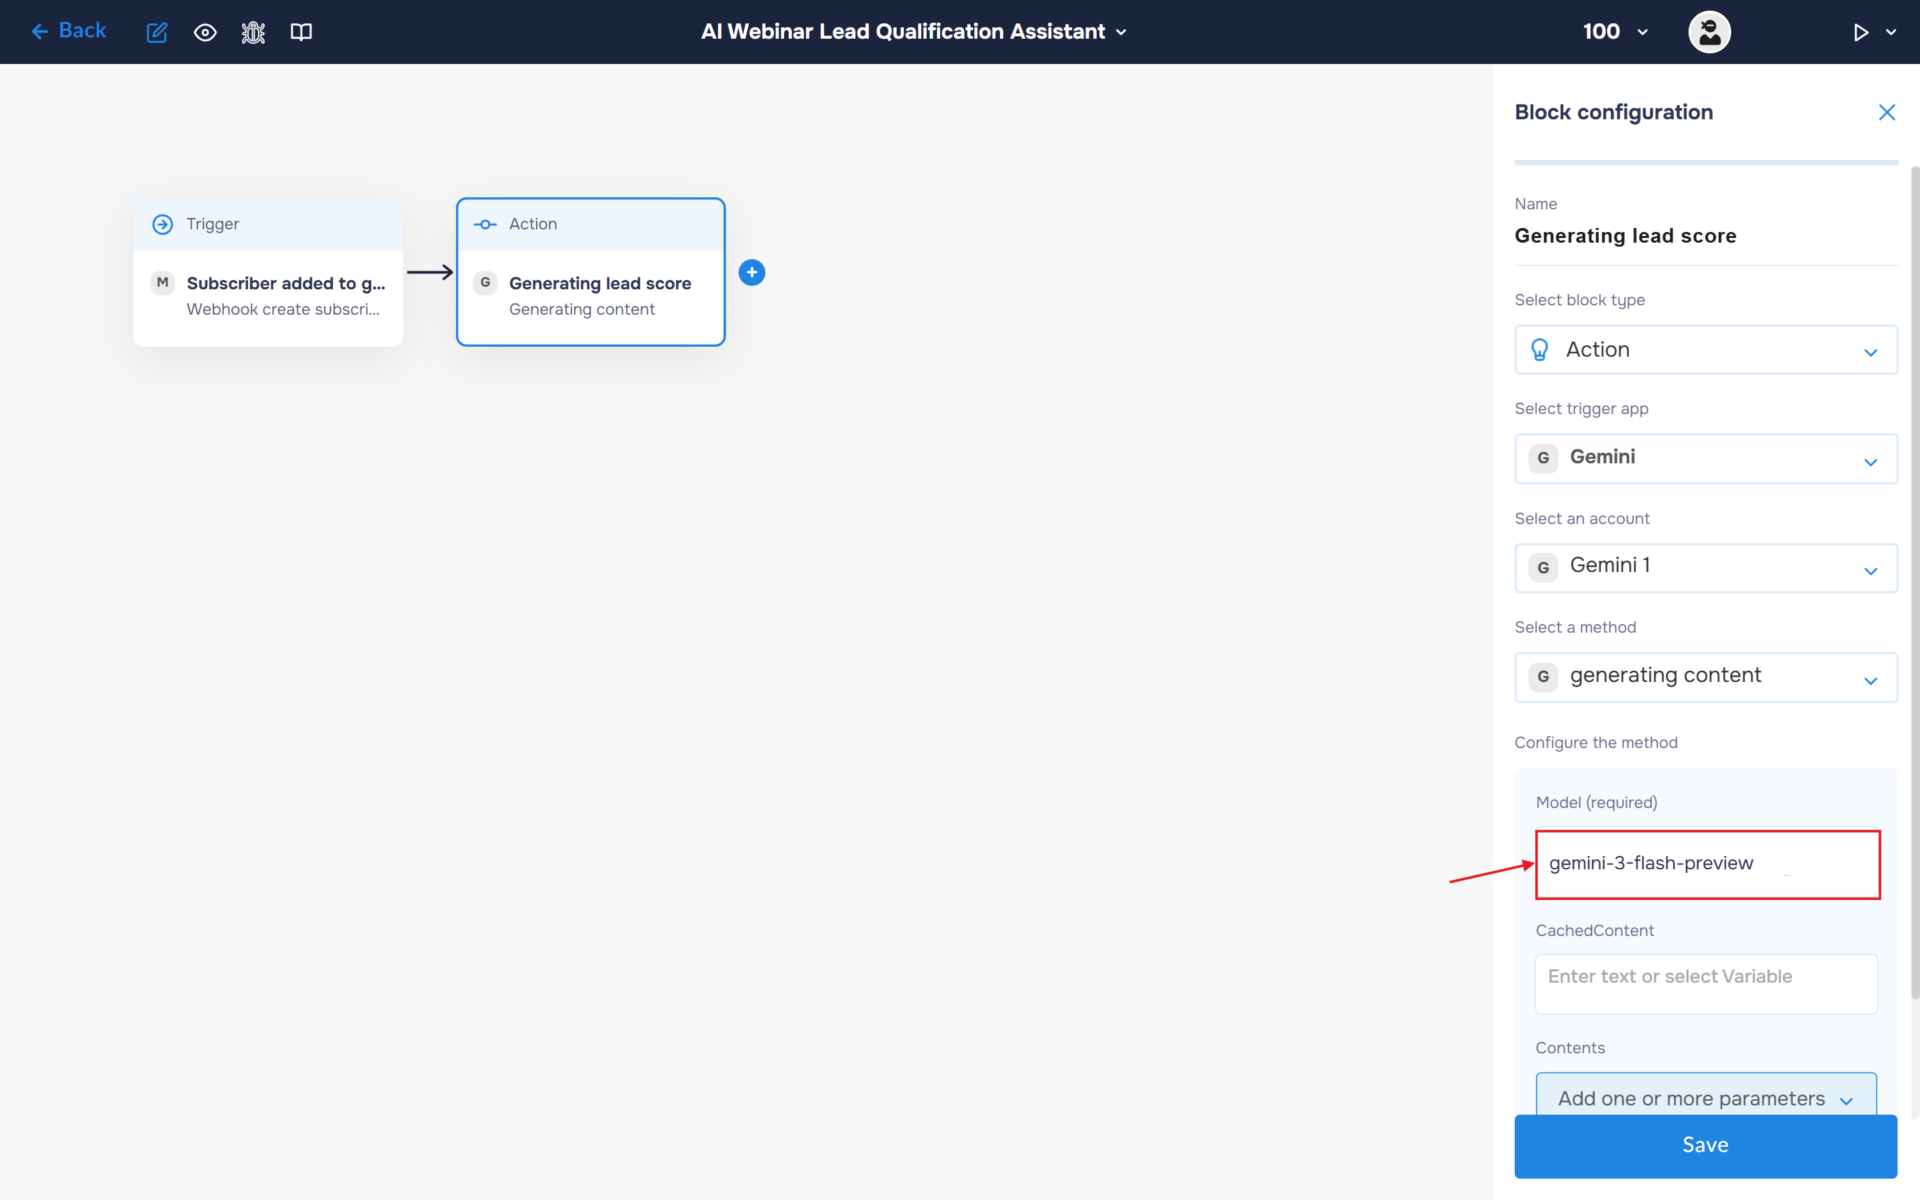
2. Specify the model name in the corresponding field (e.g., gemini-3-flash-preview).
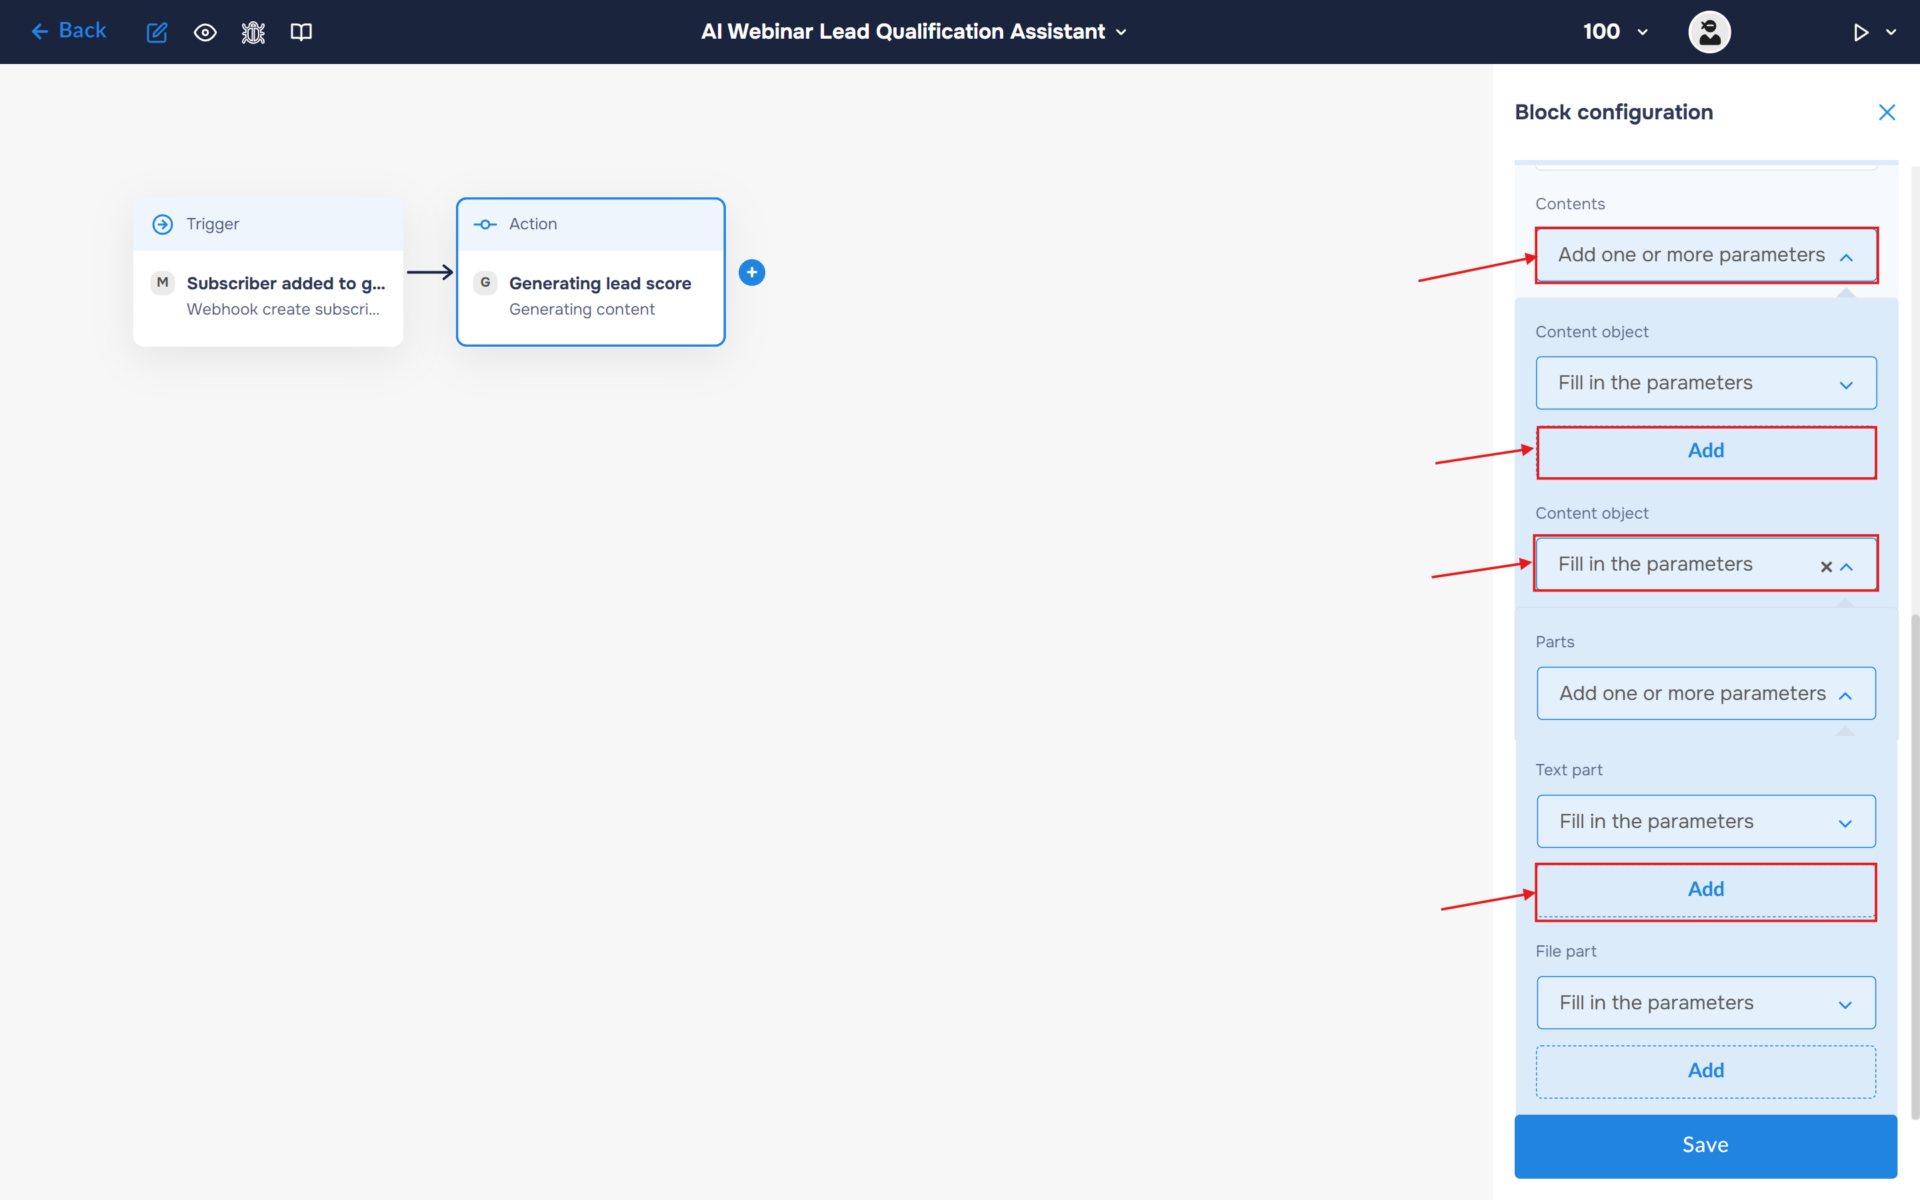
3. In the Content section, select “Add one or more parameters”. Add a Content object and expand it. Then expand Parts and add a Text object. This is where you will enter the prompt that will be sent to the AI model for processing.
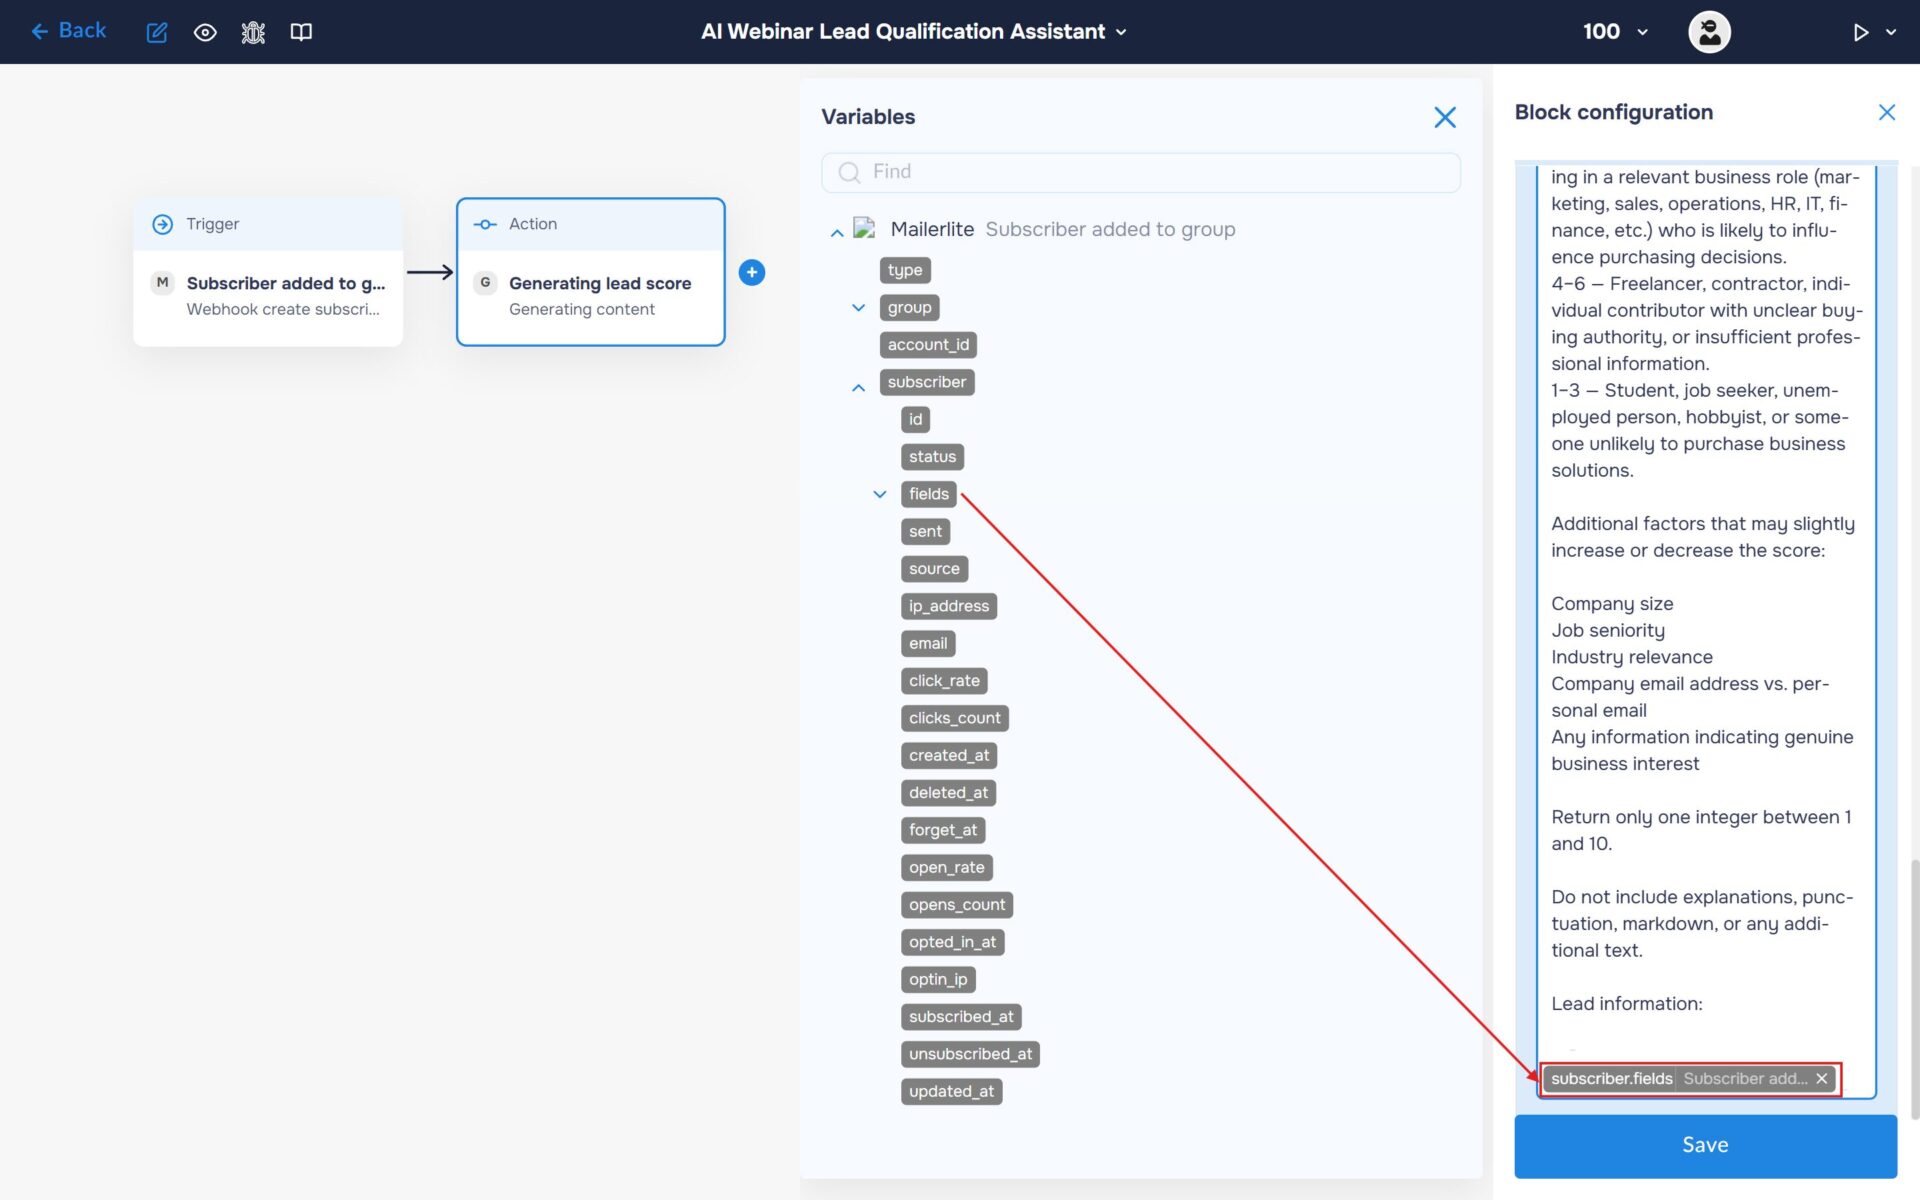
4. Fill the“ Text“ field with your prompt and insert variable “fields“ received from the MailerLite webhook.
🔧 Default Prompt: You are acting as an experienced Sales Development Representative (SDR).
Your task is to evaluate how likely a webinar registrant is to become a qualified sales opportunity.
Score the lead using the information provided below. Focus primarily on the person’s employment status and business relevance.
Scoring guidelines:
9–10 — Decision-maker, executive, founder, business owner, department head, or someone clearly responsible for purchasing software or services.
7–8 — Full-time professional working in a relevant business role (marketing, sales, operations, HR, IT, finance, etc.) who is likely to influence purchasing decisions.
4–6 — Freelancer, contractor, individual contributor with unclear buying authority, or insufficient professional information.
1–3 — Student, job seeker, unemployed person, hobbyist, or someone unlikely to purchase business solutions.
Additional factors that may slightly increase or decrease the score:
Company size
Job seniority
Industry relevance
Company email address vs. personal email
Any information indicating genuine business interest
Return only one integer between 1 and 10.
Do not include explanations, punctuation, markdown, or any additional text.
Lead information: [SUBSCRIBER DATA]
Step 3: Route Leads Based on Qualification
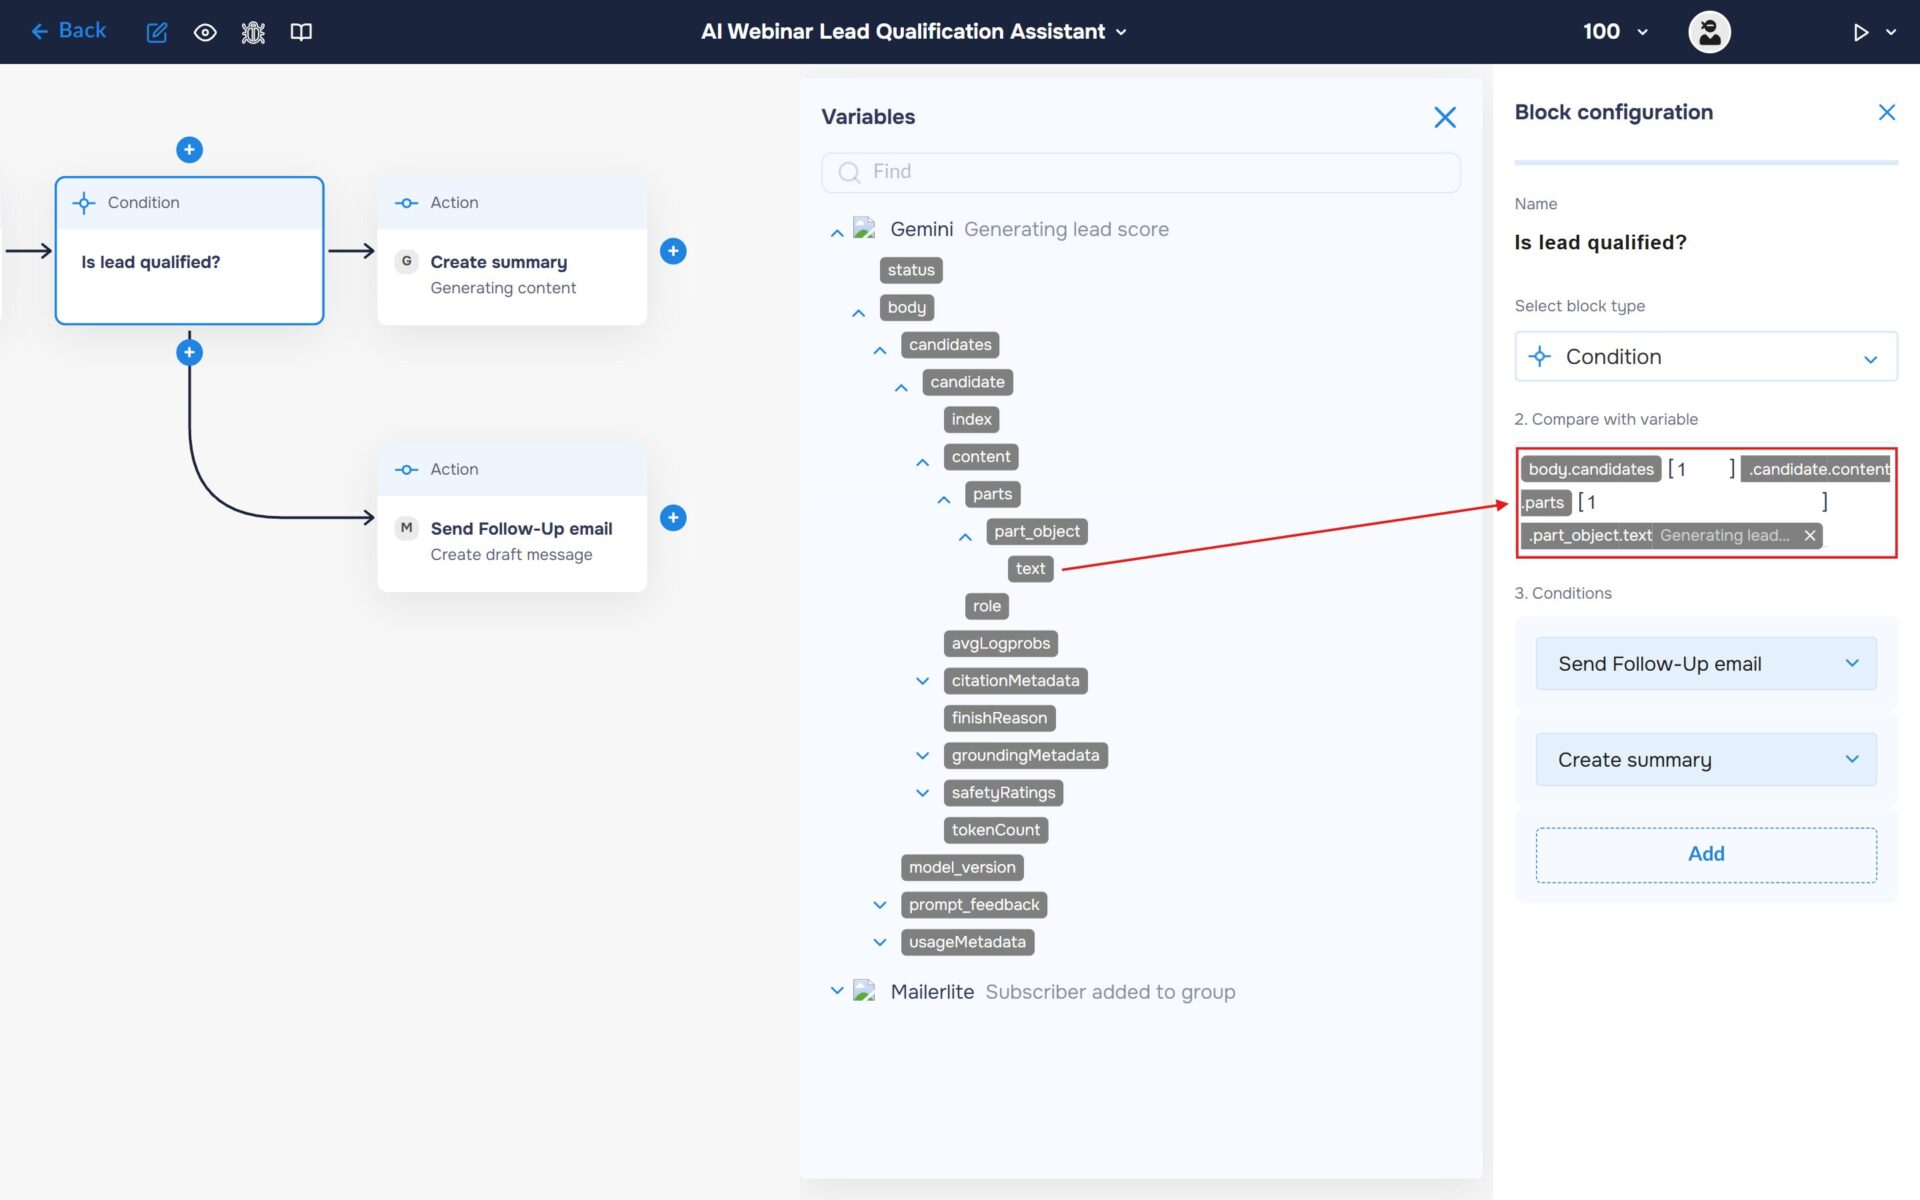
1. Now we need to tell the workflow how to handle webinar registrations based on the lead score generated by Gemini AI. We will use a router (“Condition” block) to split the automation into two paths depending on the lead’s qualification.
Add the “Condition” block to determine whether the registrant should be handed over to the sales team or continue through the standard marketing journey.
In the “Compare with variable” field, insert the lead score returned by the Gemini AI block.
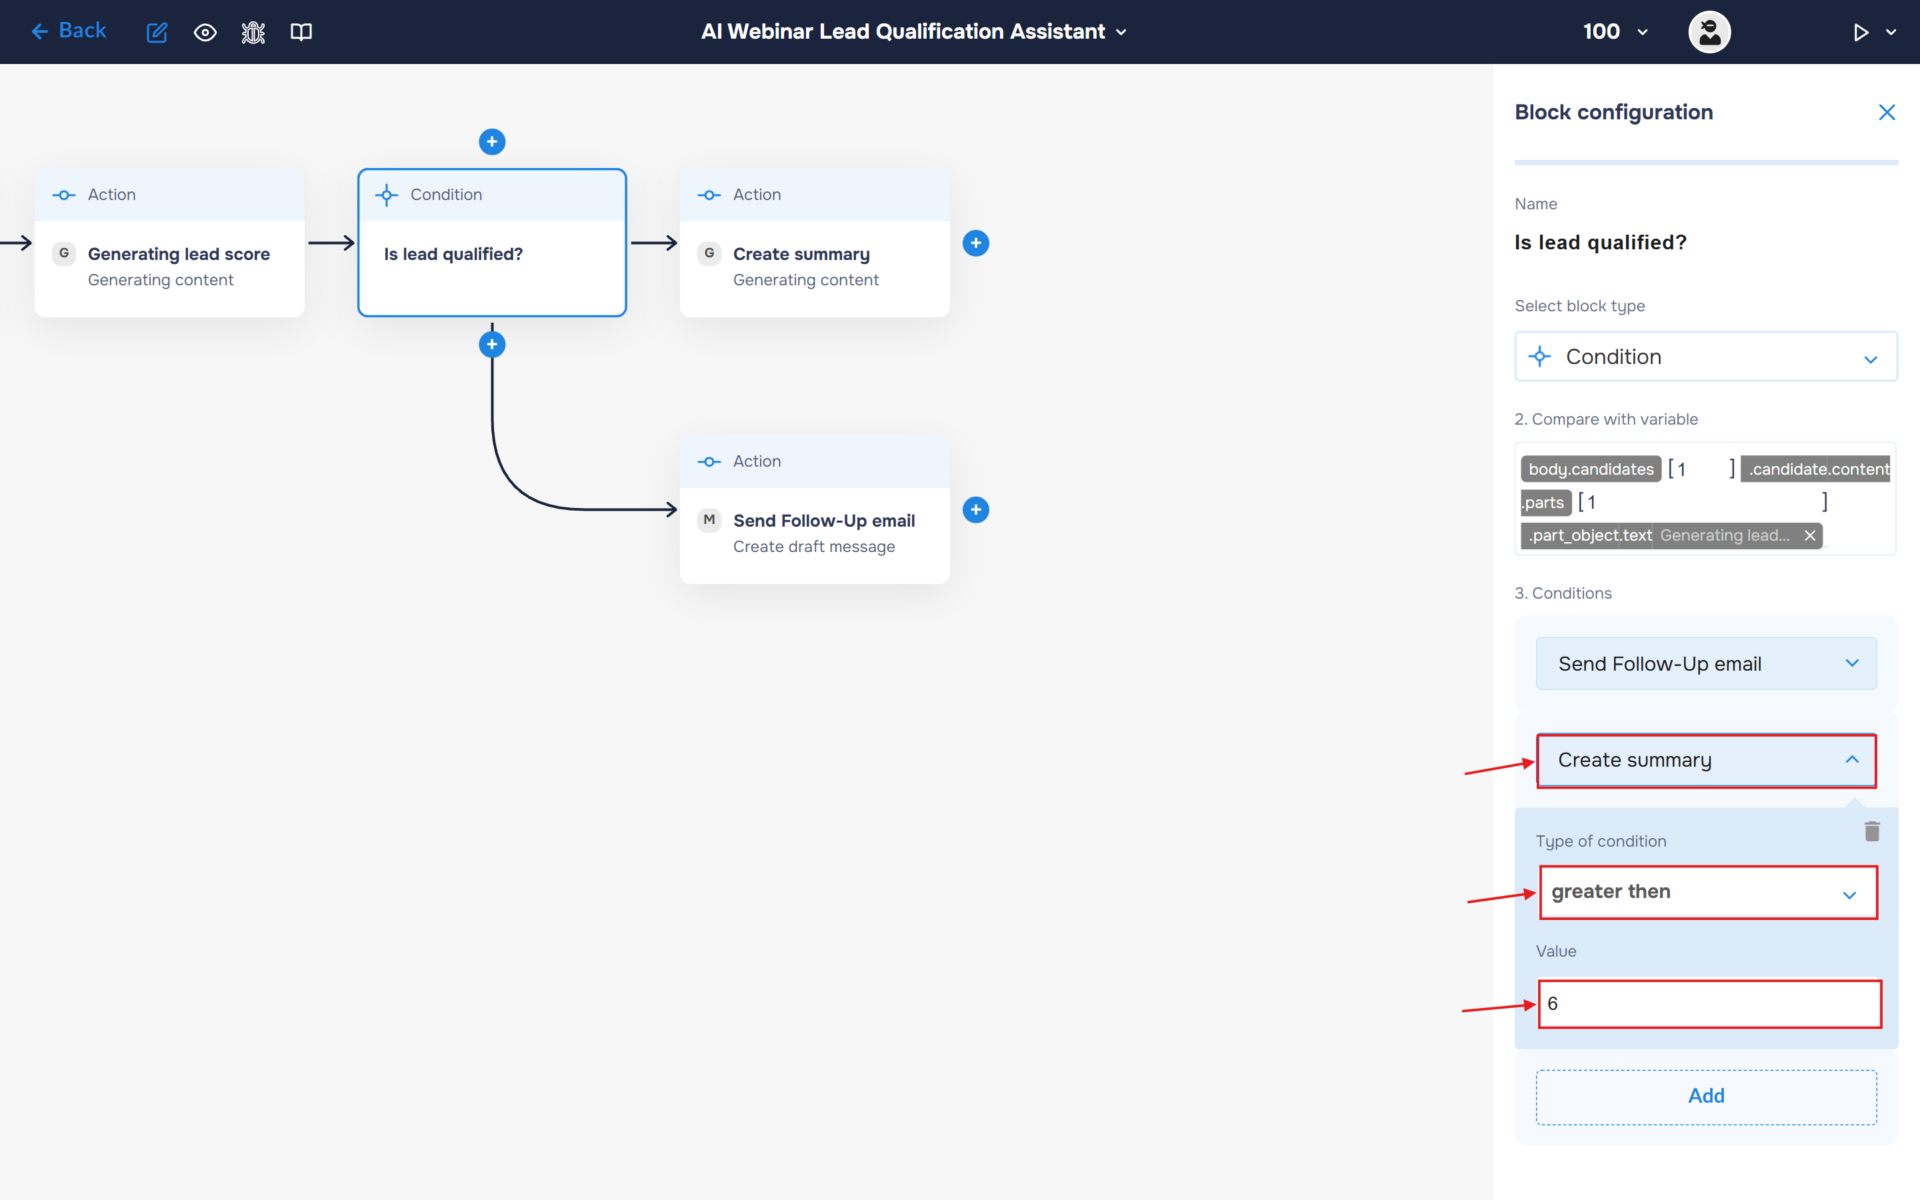
2. Add a “Create summary” block — Step 4. Leads with a high qualification score are considered sales-ready. The workflow will automatically create a task in ClickUp containing the lead summary, contact information, and qualification score, allowing the sales team to follow up as quickly as possible.
In the “Conditions” section, expand the newly created block and configure the following values:
- Type of Condition: “greater then”
- Value: “6”
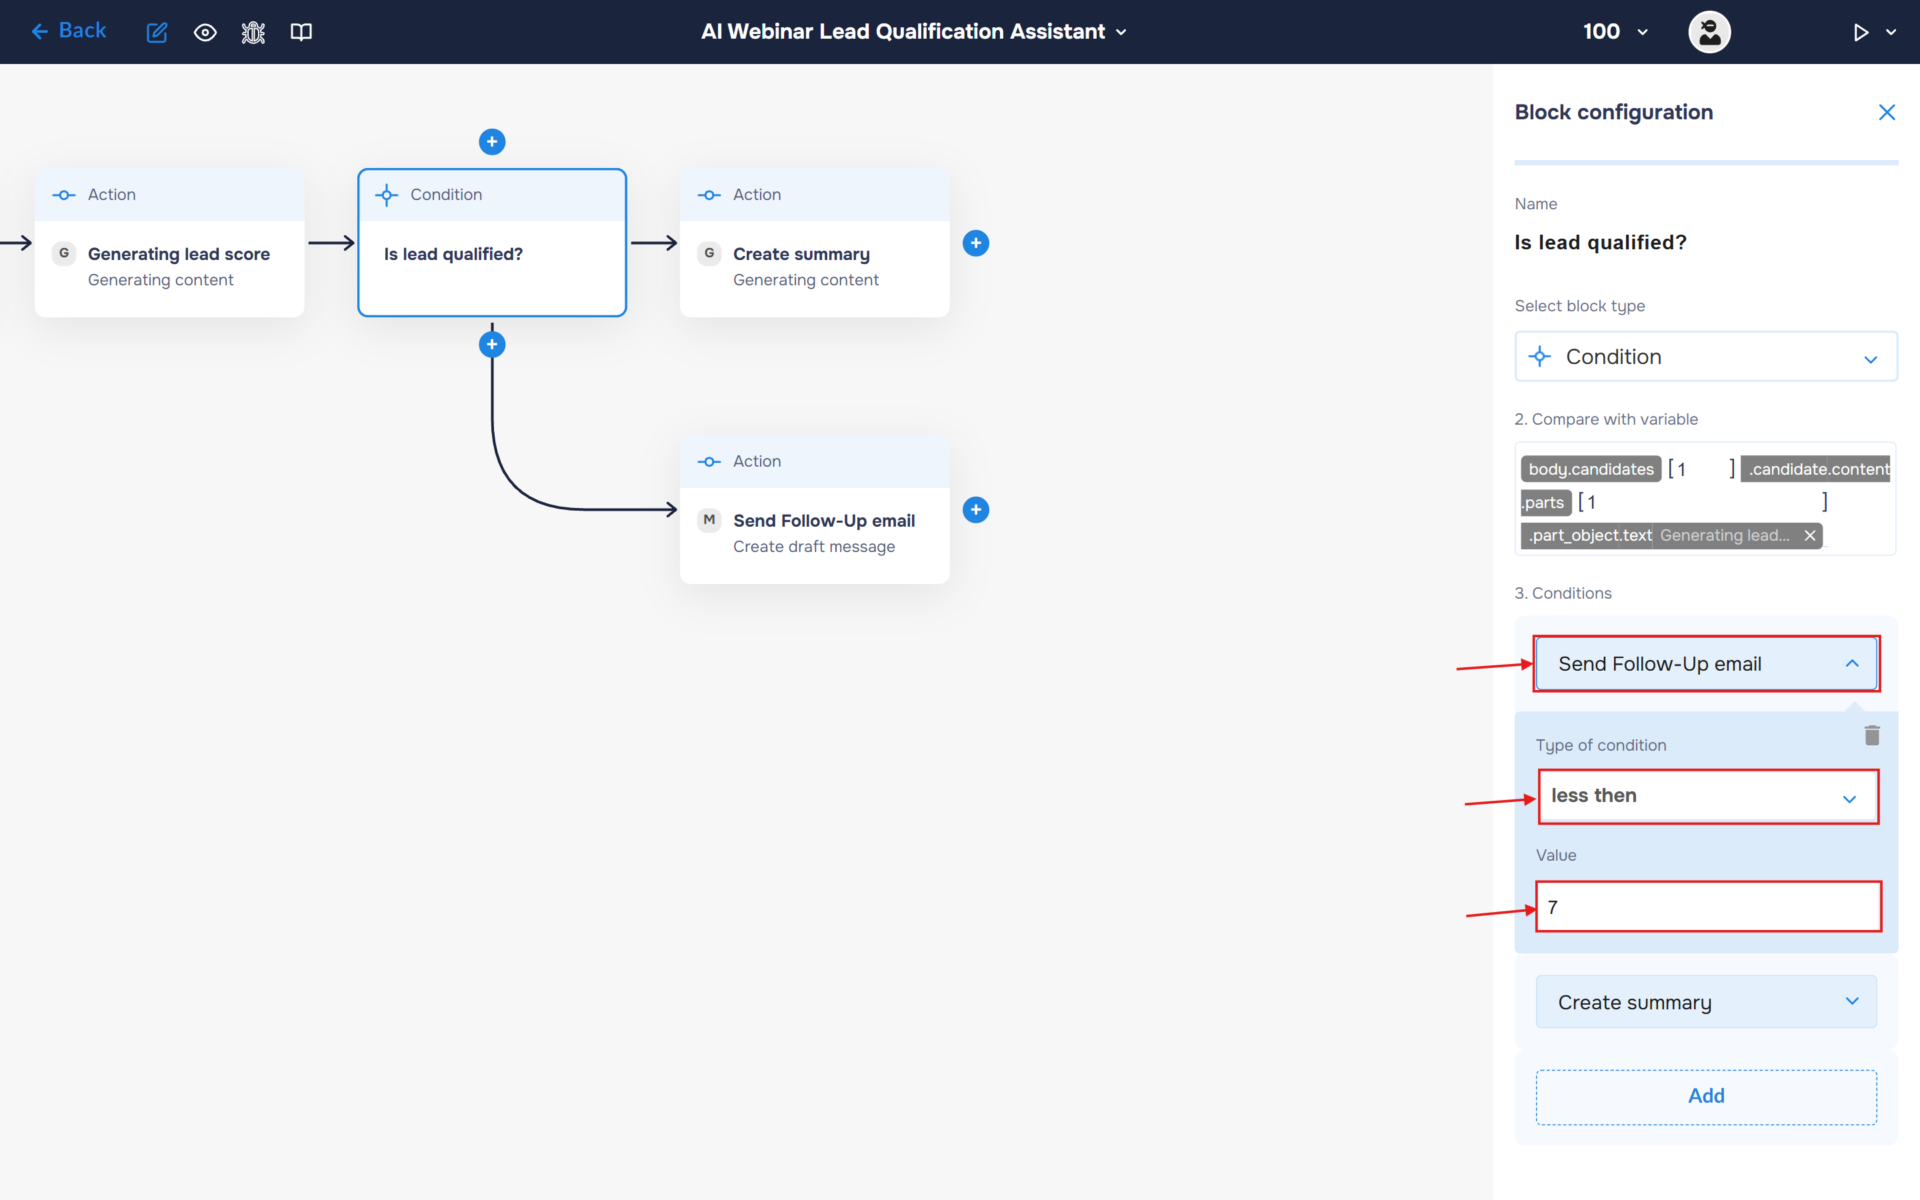
3. Add a “Send Follow-Up email” block — Step 5. Leads with lower qualification scores will not be forwarded to the sales team. Instead, they will receive a standard follow-up email and can continue through your automated marketing or nurturing campaigns without requiring manual intervention.
In the “Conditions” section, expand the newly created block and configure the following values:
- Type of Condition: “less then”
- Value: “7”
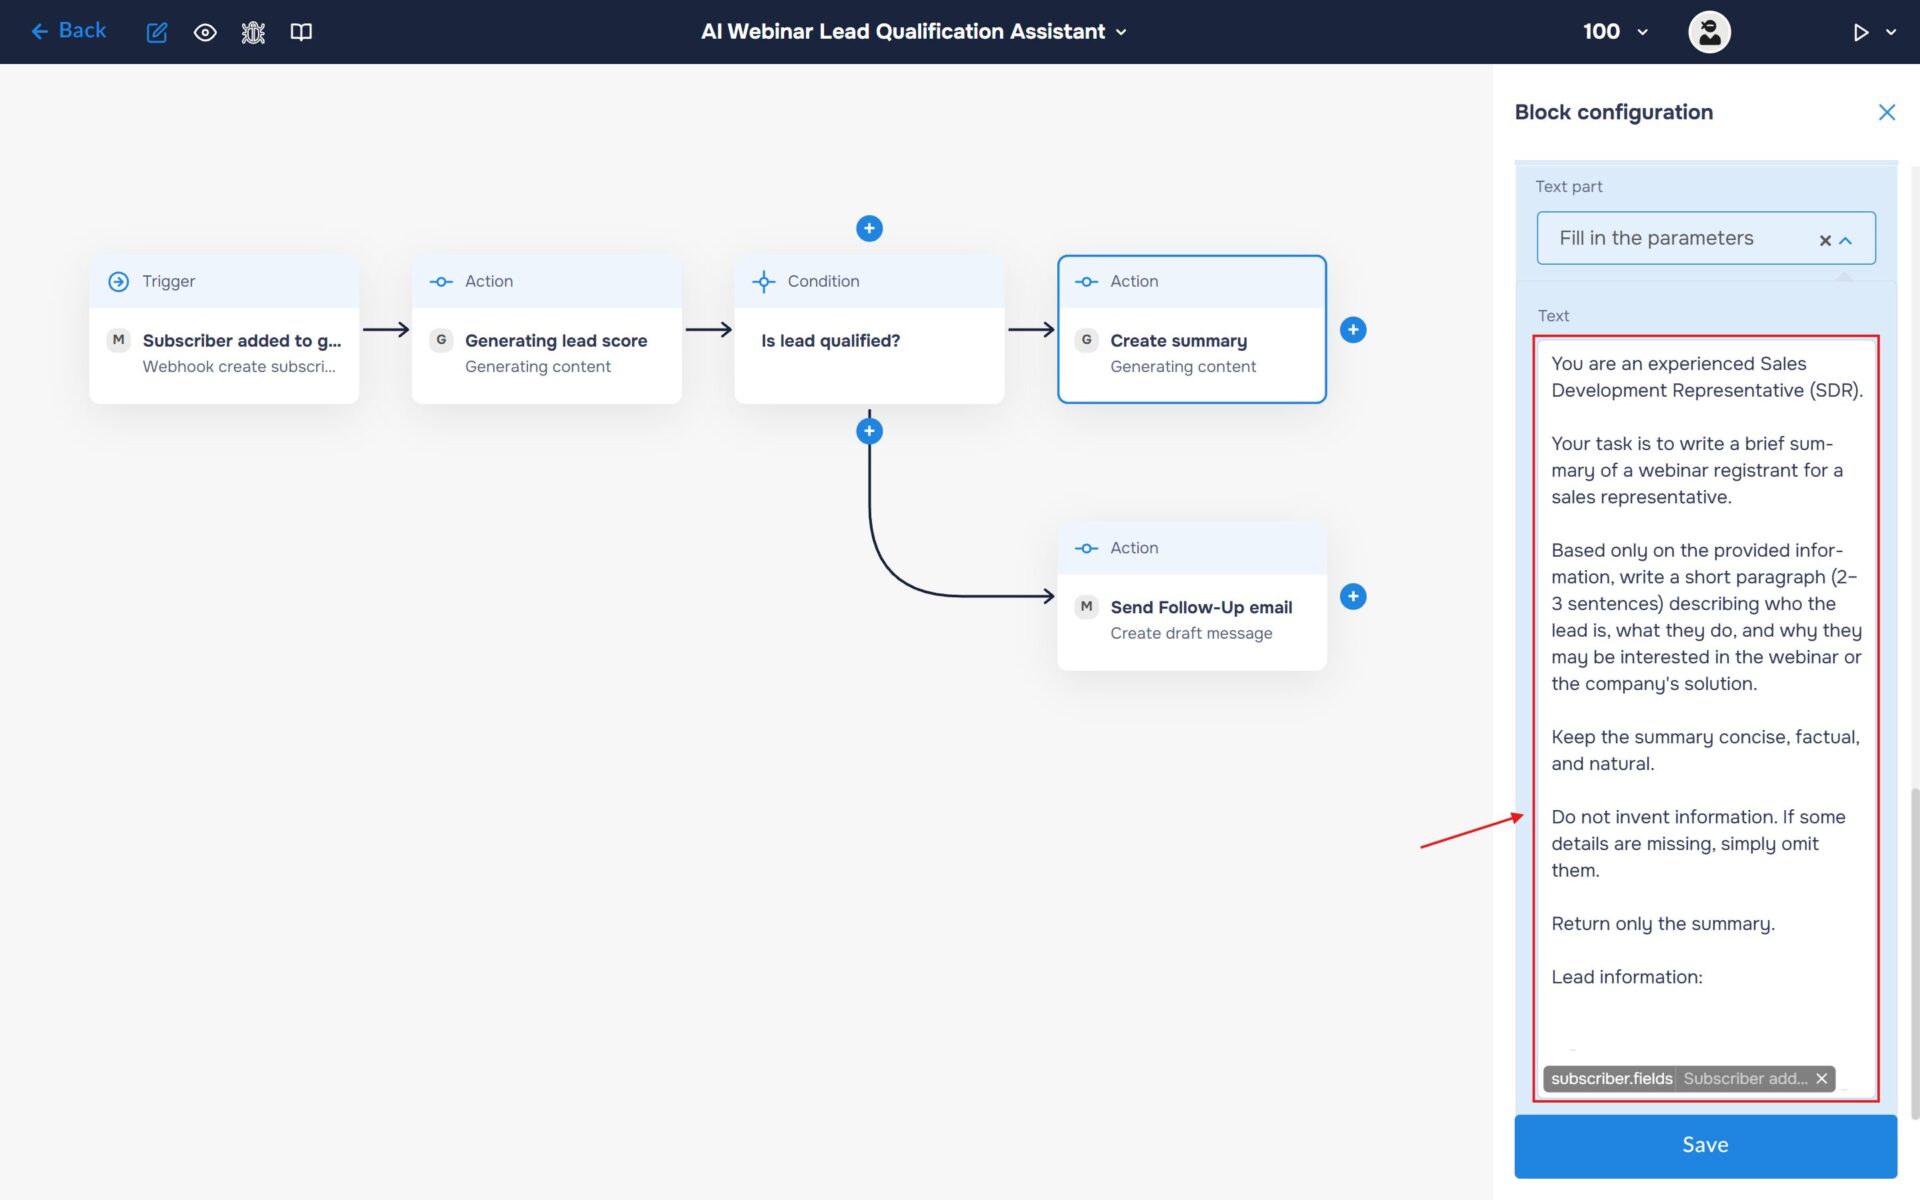
Step 4.1: Generate a Lead Summary for the ClickUp Task
Configure the Gemini AI block following the same steps as in Step 2. Use the same model and settings, but replace the prompt with the one designed to generate a concise lead summary for the ClickUp task description.
🔧 Default Prompt: You are an experienced Sales Development Representative (SDR).
Your task is to write a brief summary of a webinar registrant for a sales representative.
Based only on the provided information, write a short paragraph (2–3 sentences) describing who the lead is, what they do, and why they may be interested in the webinar or the company’s solution.
Keep the summary concise, factual, and natural.
Do not invent information. If some details are missing, simply omit them.
Return only the summary.
Lead information: [SUBSCRIBER DATA]
Step 4.2: Create a Task in ClickUp
1. Now we’ll automatically hand qualified webinar leads over to the sales team. Configure a ClickUp action to create a new task containing the lead’s details, qualification score, and AI-generated summary. This allows sales representatives to follow up quickly while the lead is still engaged.
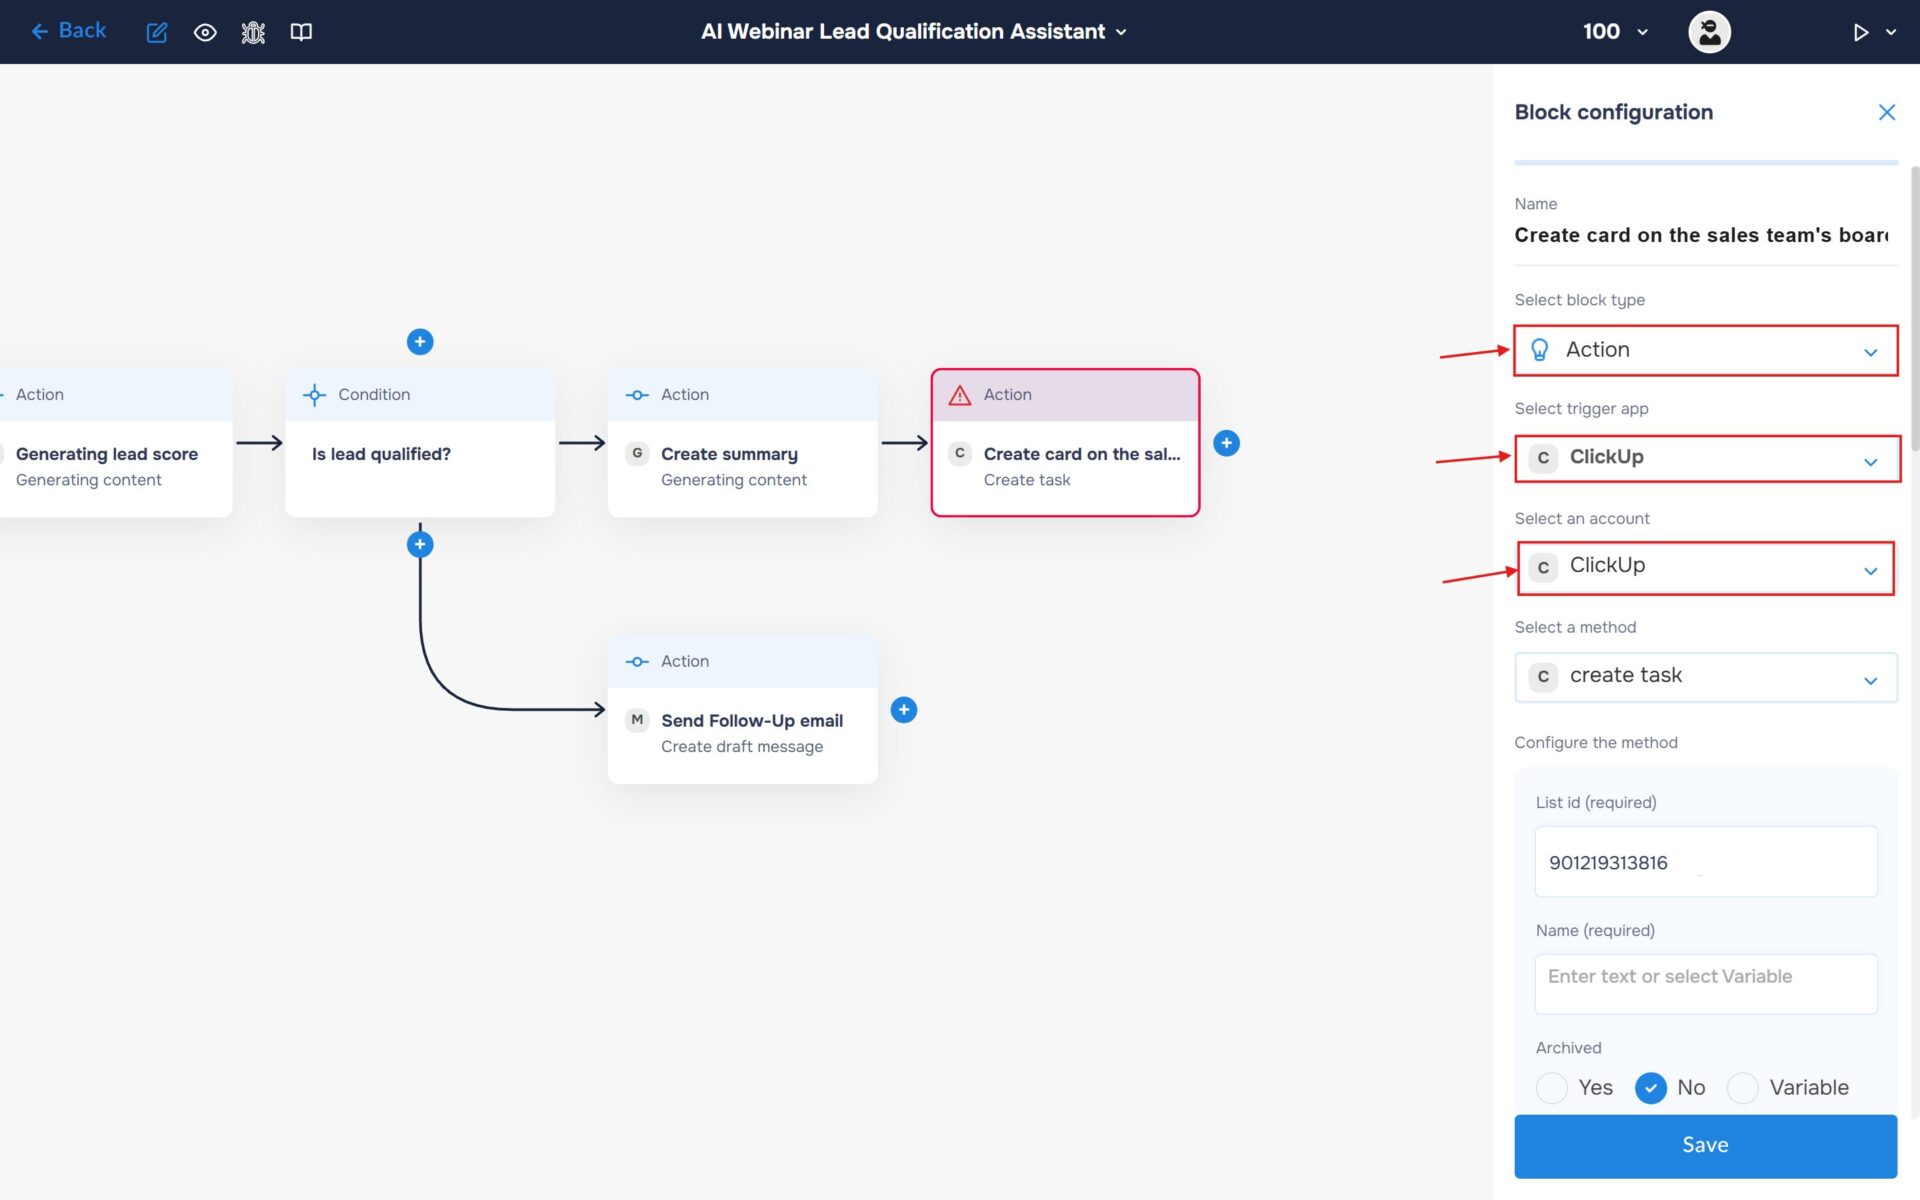
- In the “Block Configuration“ panel, click on the “Select block type“ field and select the “Action” type.
- Next, you need to add ClickUp service by clicking on the field “Select trigger app“; find and select “ClickUp“.
- To connect you need to create an authorisation. Click on the “Sign in“ button in the “Select an account“ section.
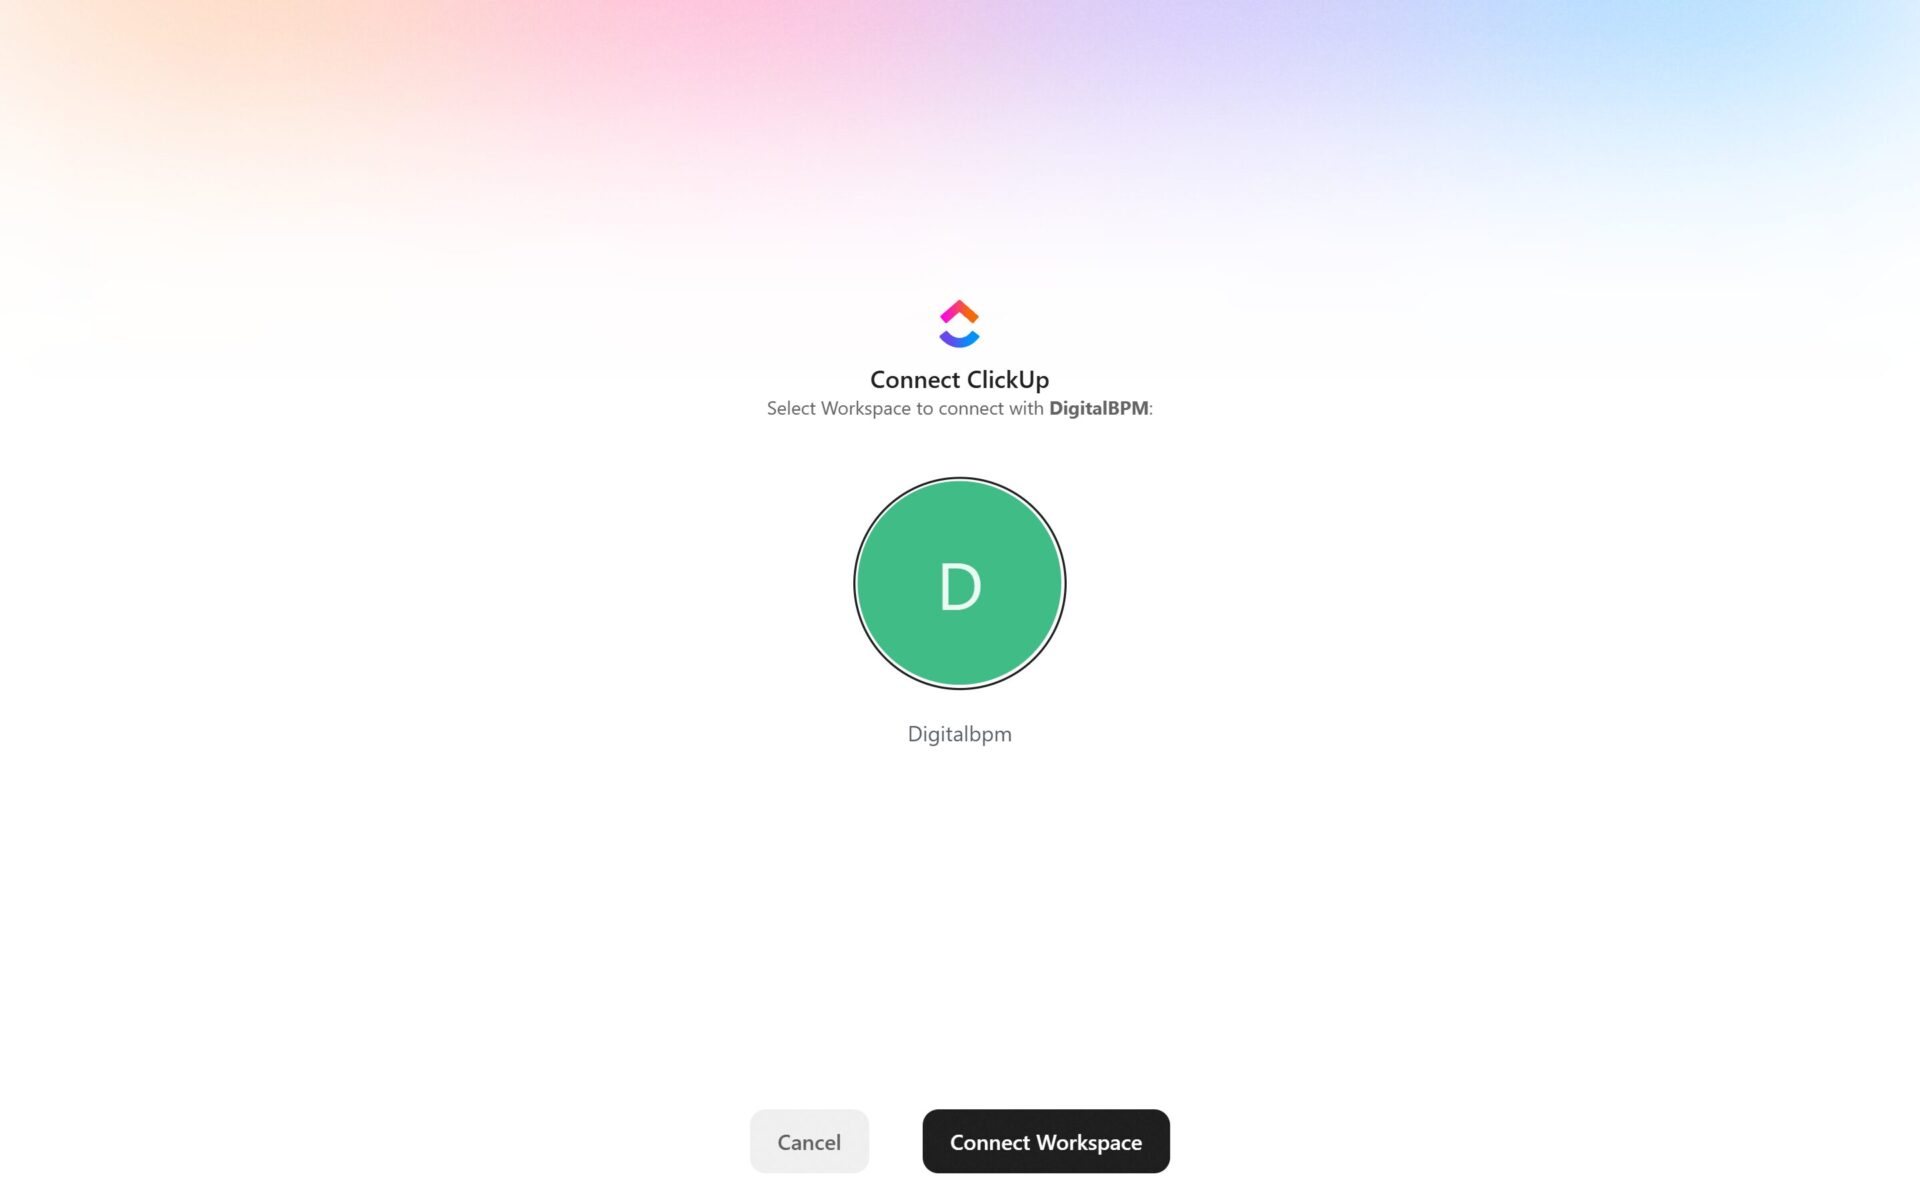
2. Sign in to your ClickUp account and grant DigitalBPM the required permissions to access your workspace.
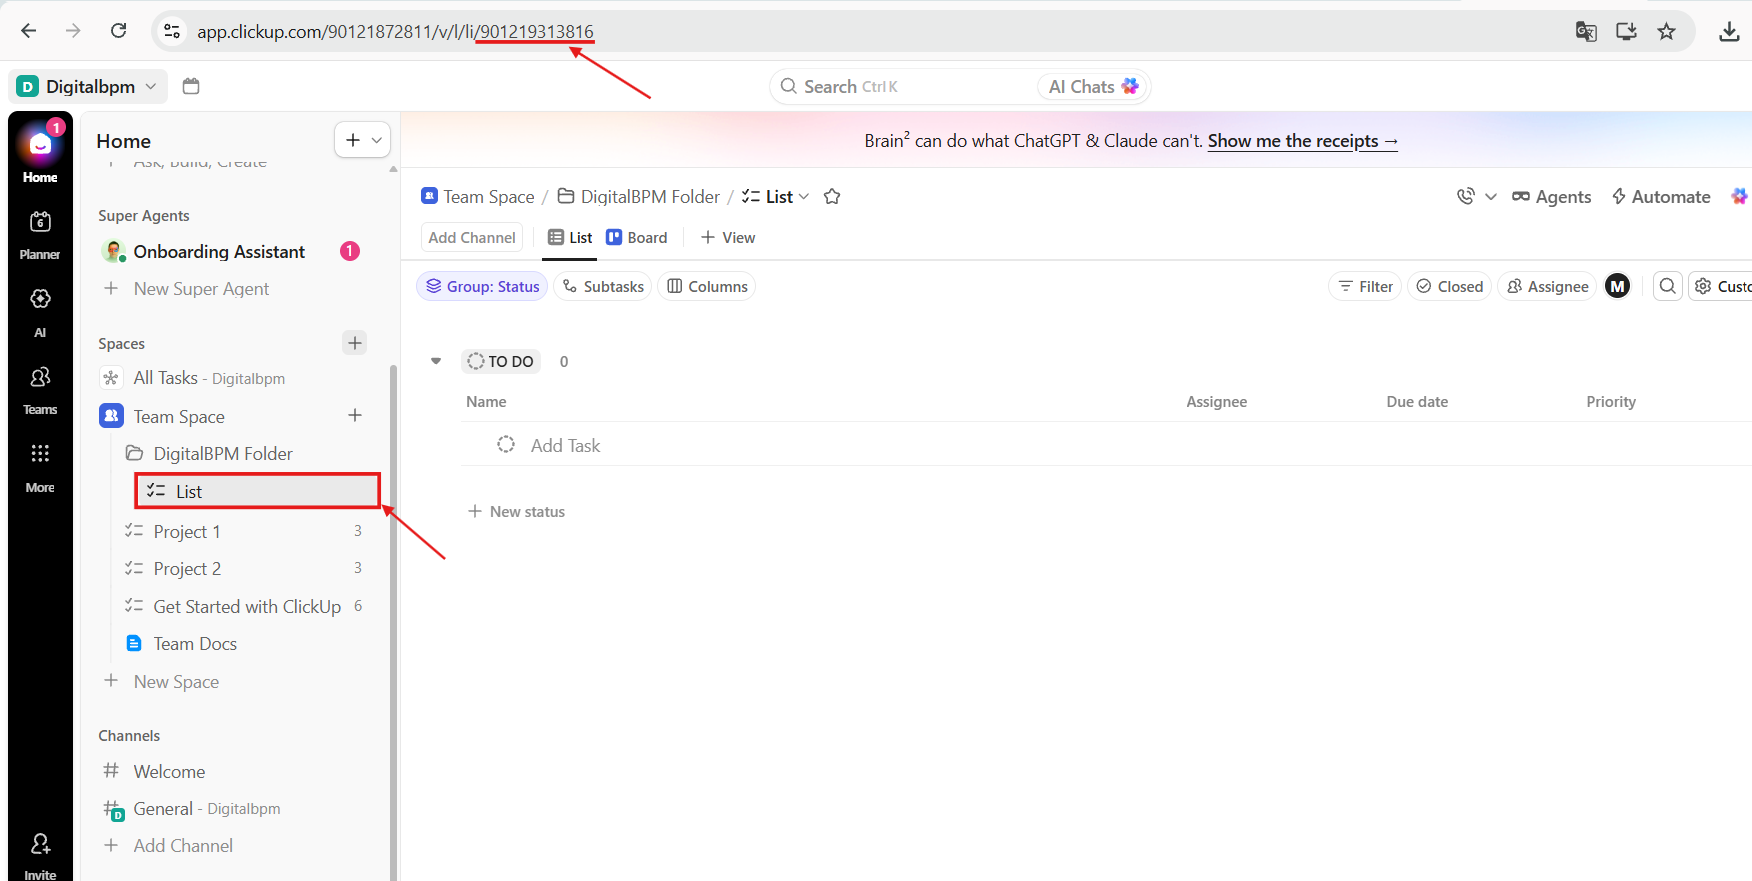
3. Open ClickUp and navigate to the Space > Folder > List where you want new tasks to be created. Then copy the List ID from your browser’s address bar.
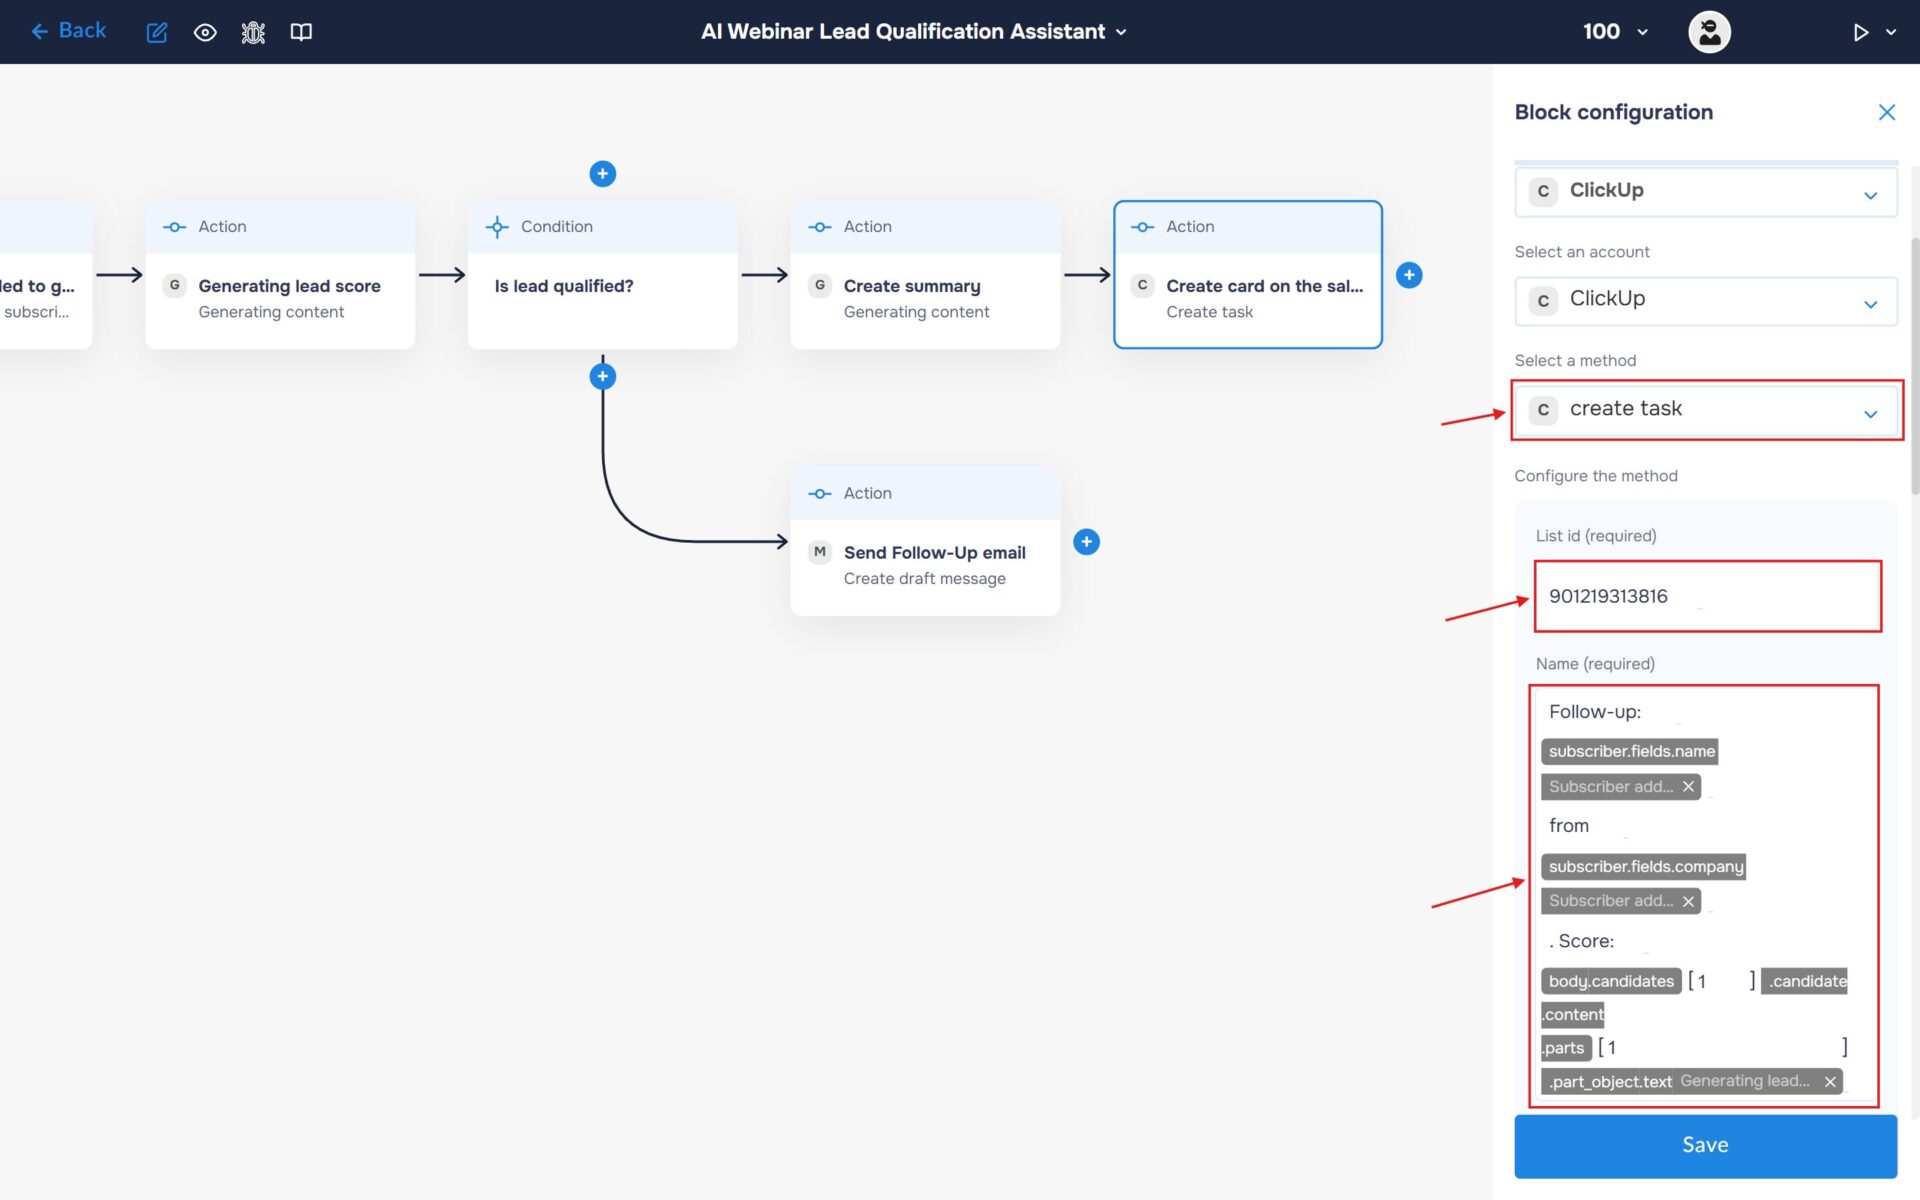
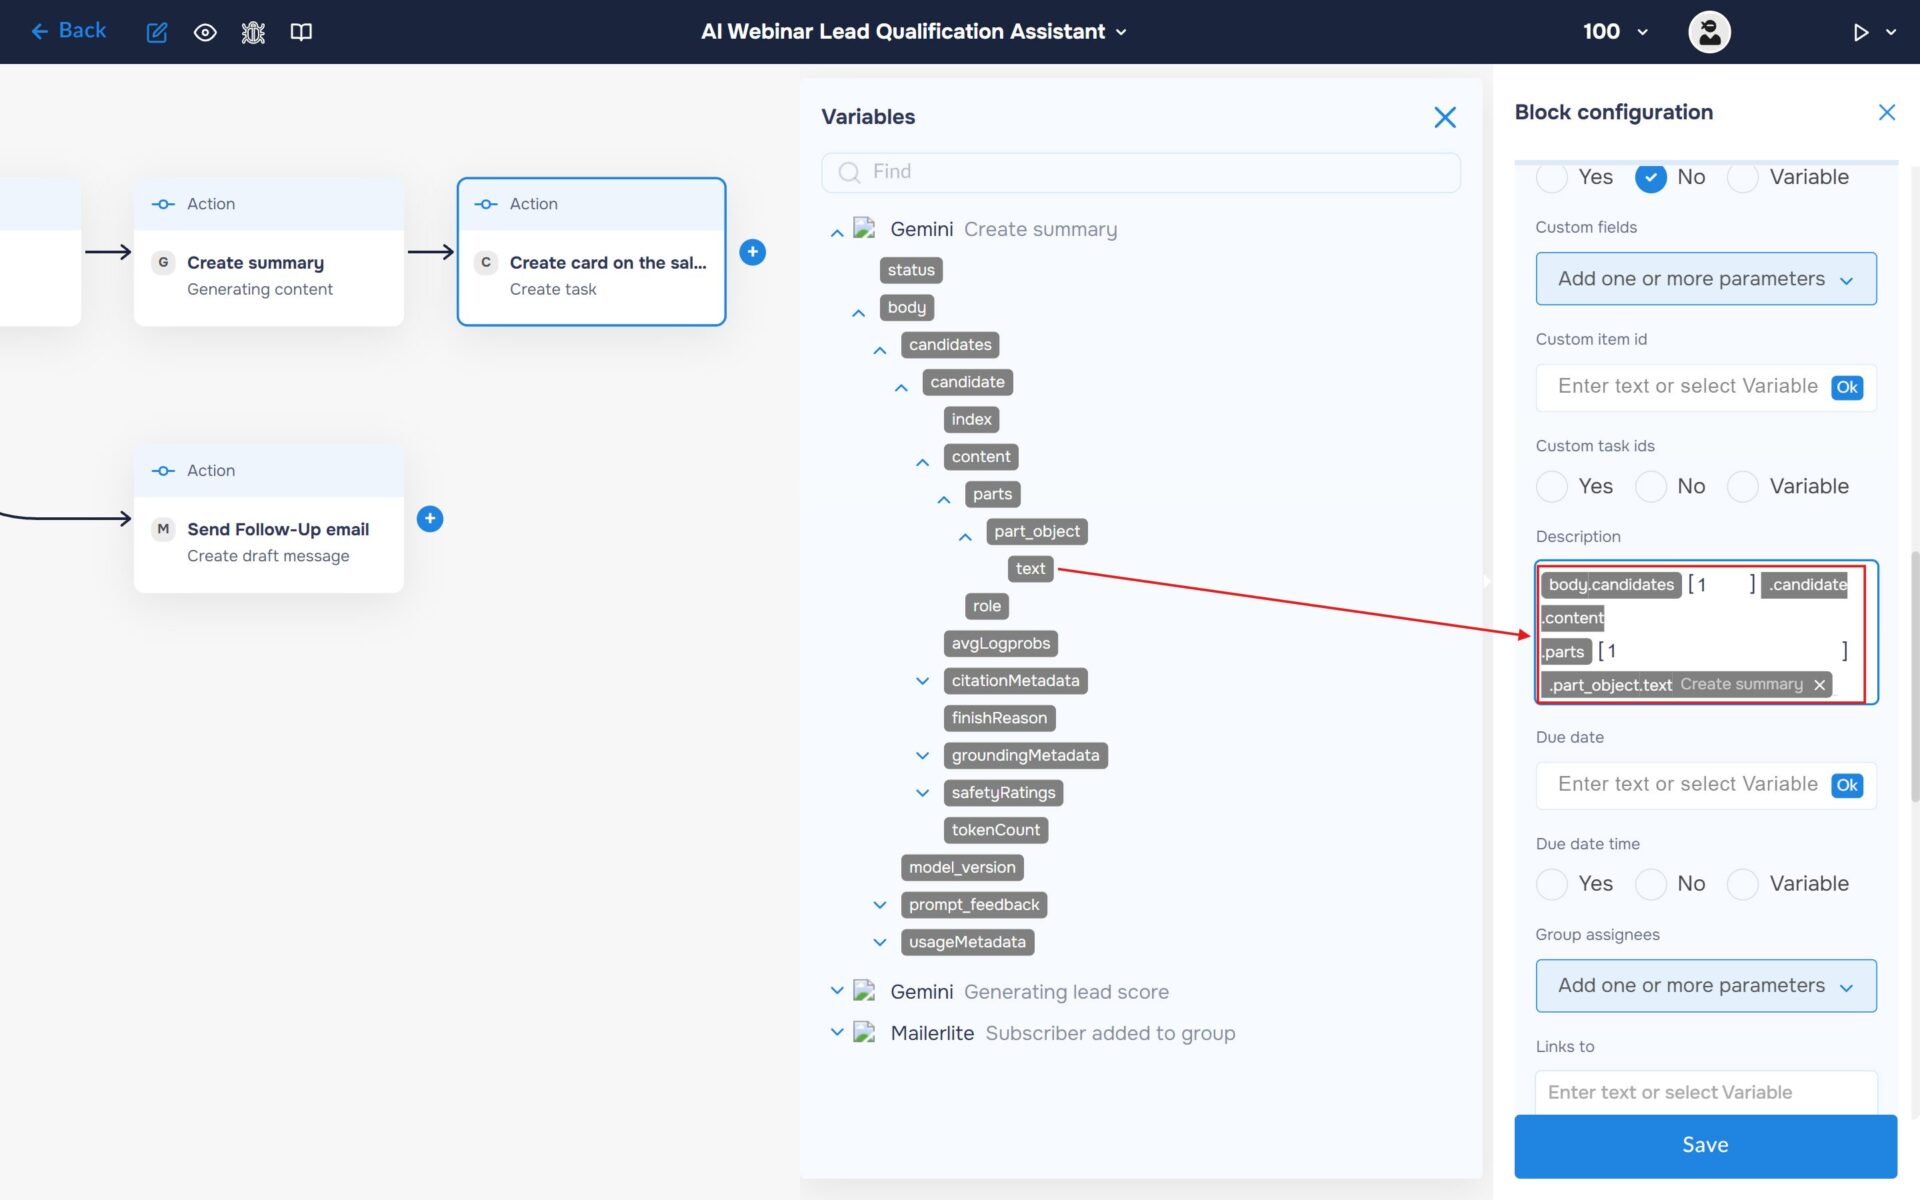
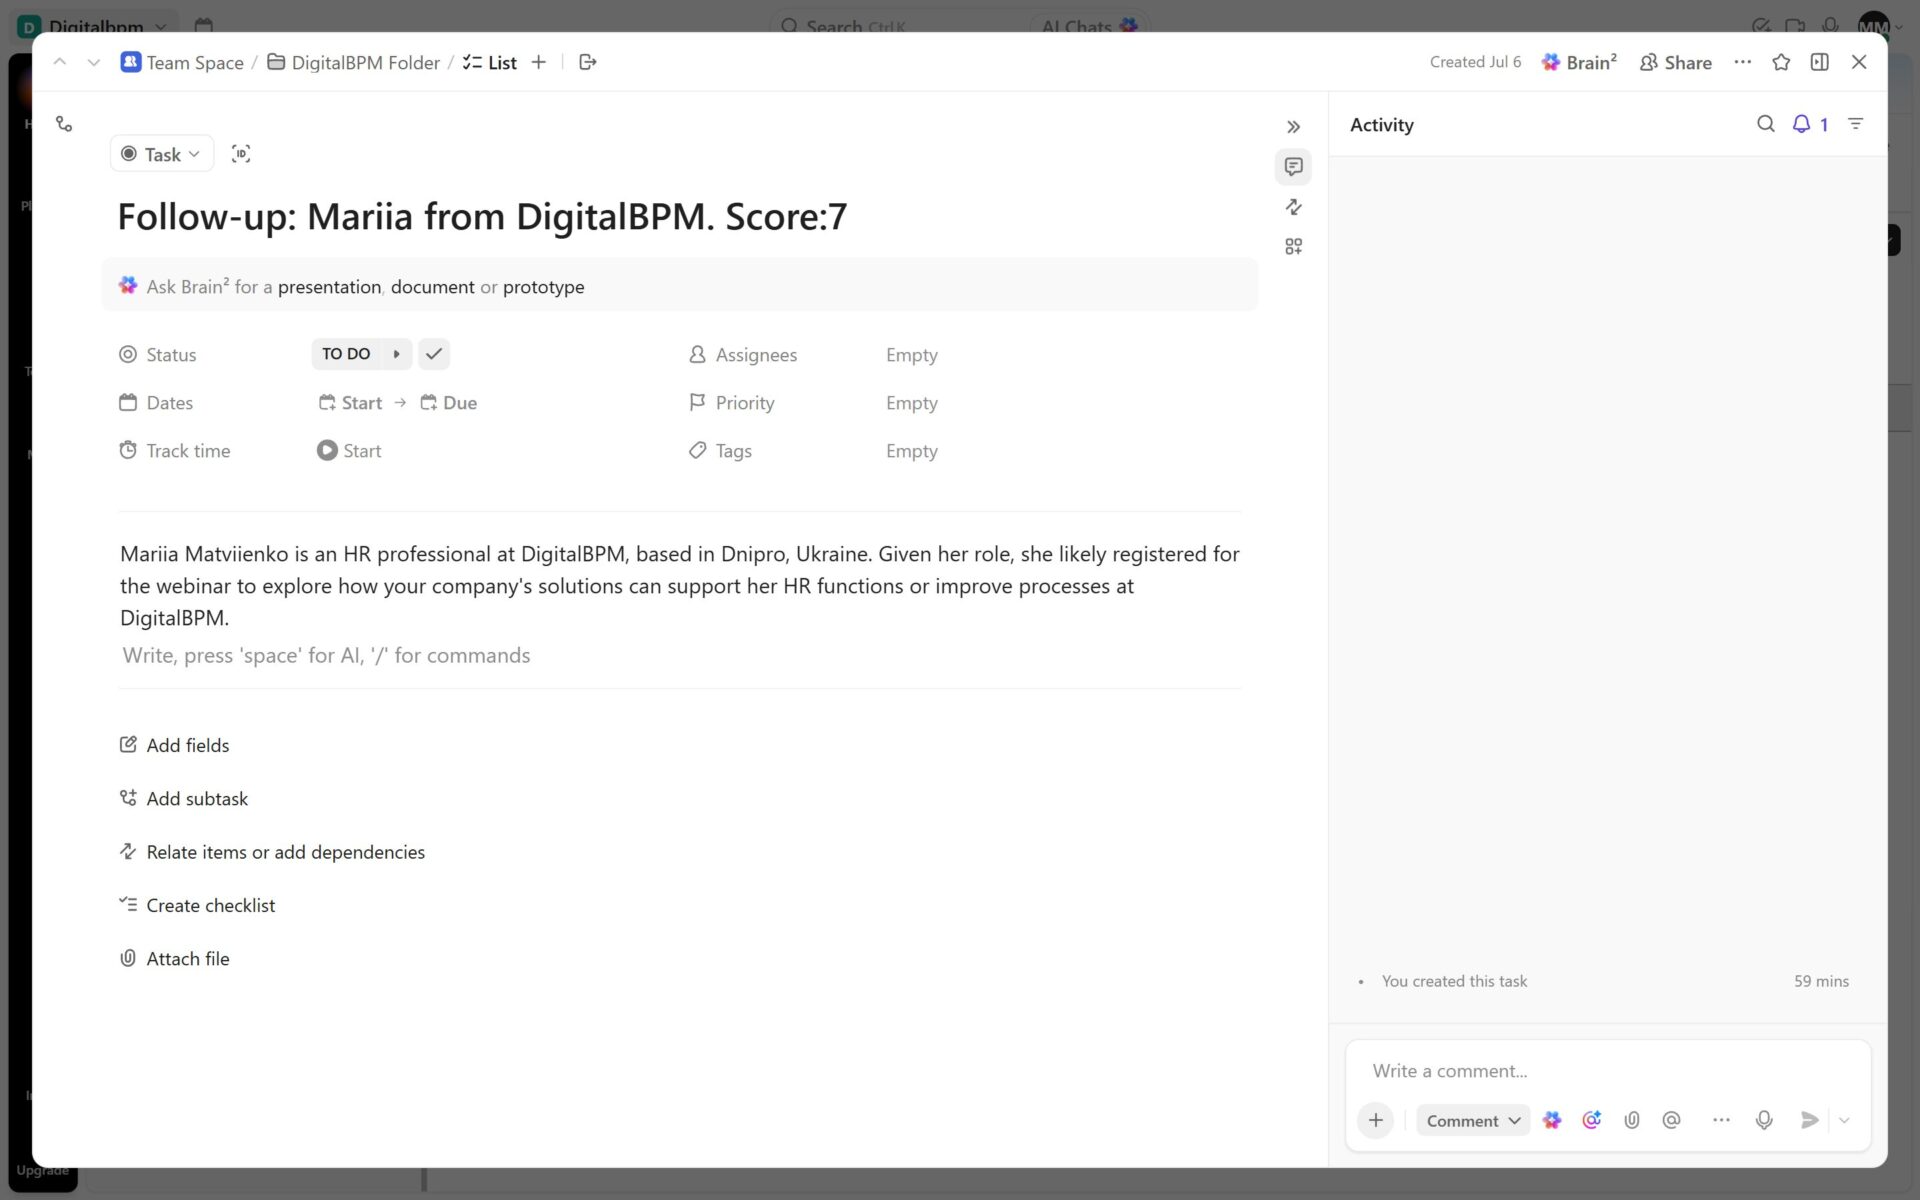
4. Select the “create task” method. In the “List ID” field, insert the ID of list. In the “Name” field, enter the name of the task (for example, “Follow-up: {Name} from {Company}. Score: {Lead Score from Gemini}”).
5. In the “Description” field, insert the lead summary generated by the Gemini AI block.
Step 5: Create an Outlook Draft Email for Unqualified Leads
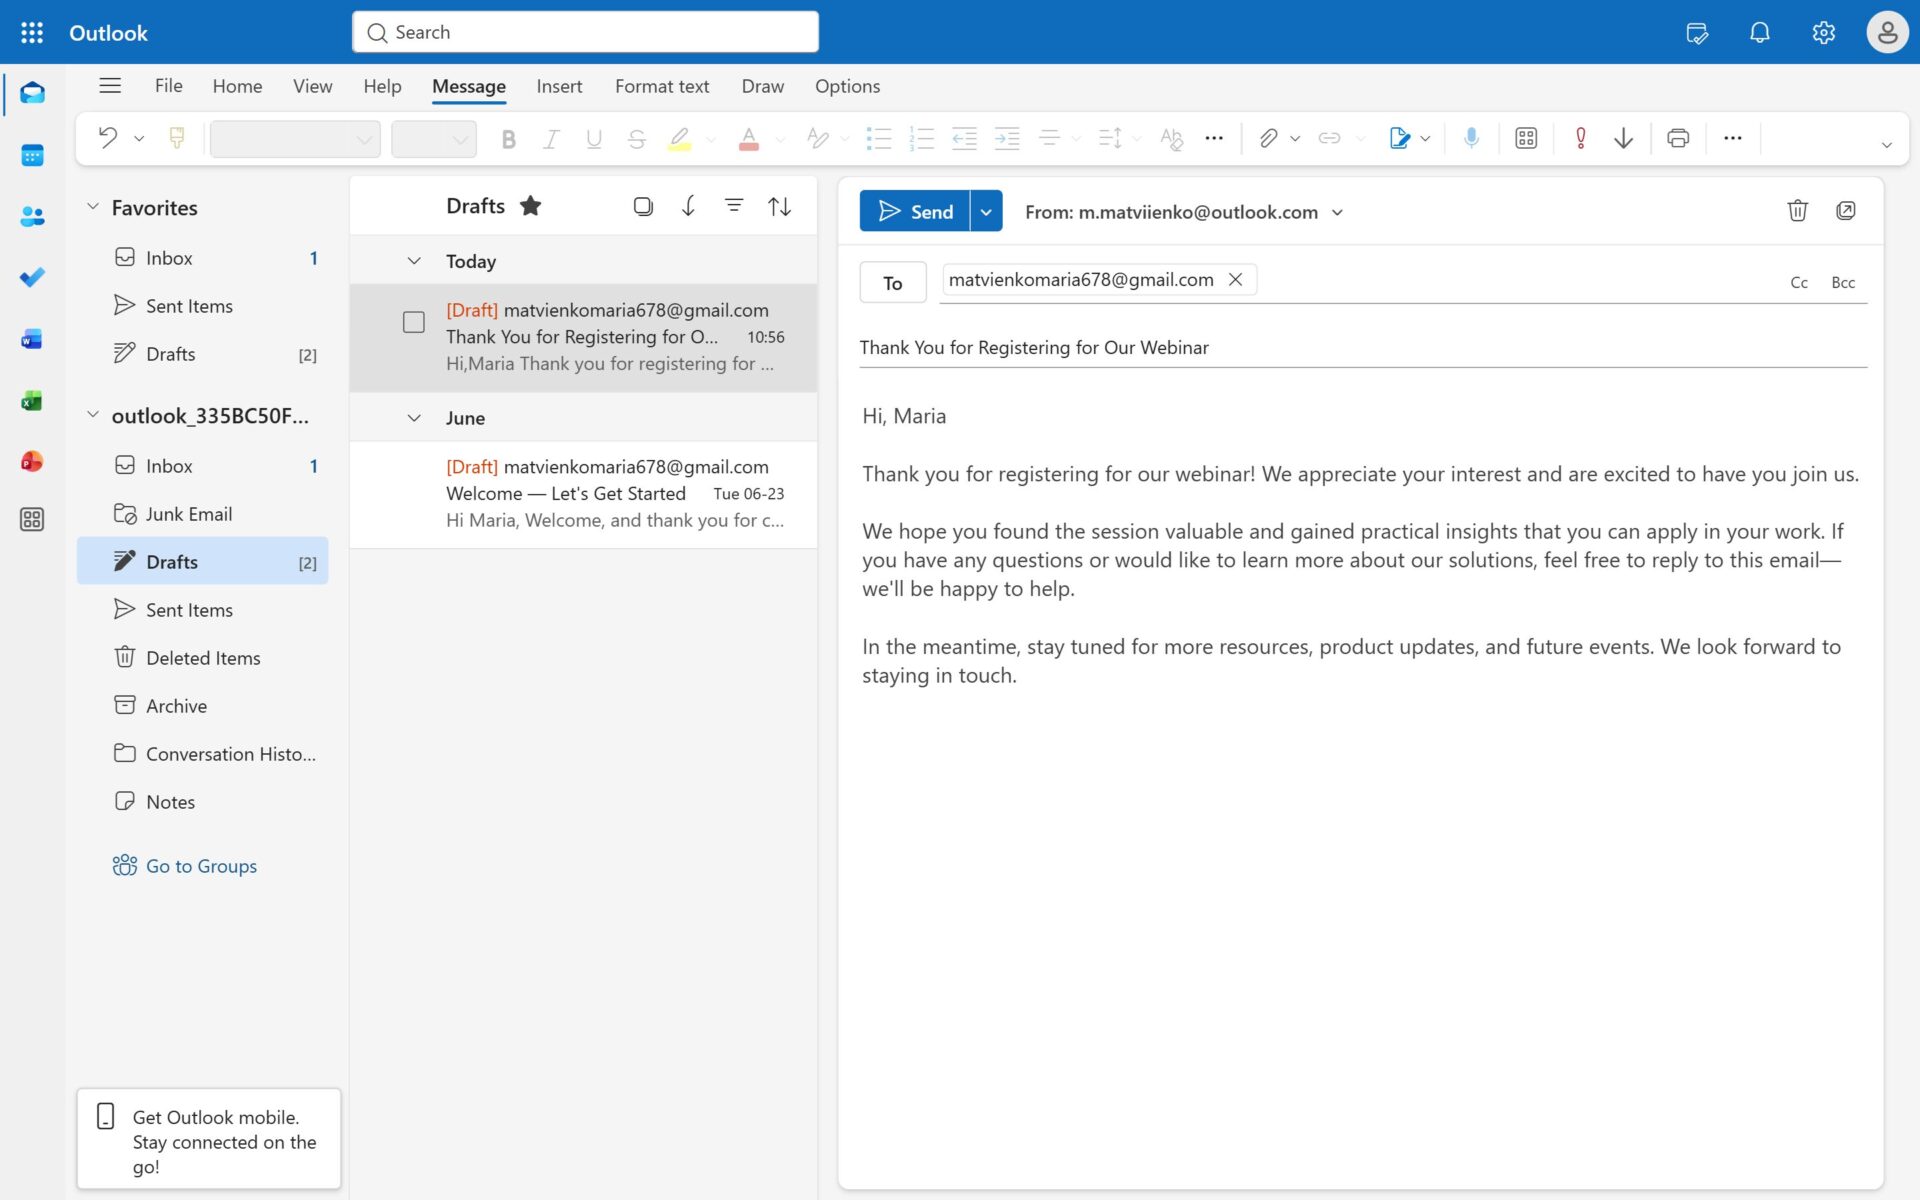
Although these leads are not immediately qualified for sales follow-up, they may still represent future opportunities. Instead of sending an email automatically, we’ll create a draft in Outlook so your marketing team can review, personalize, or schedule it as part of a broader nurturing campaign.
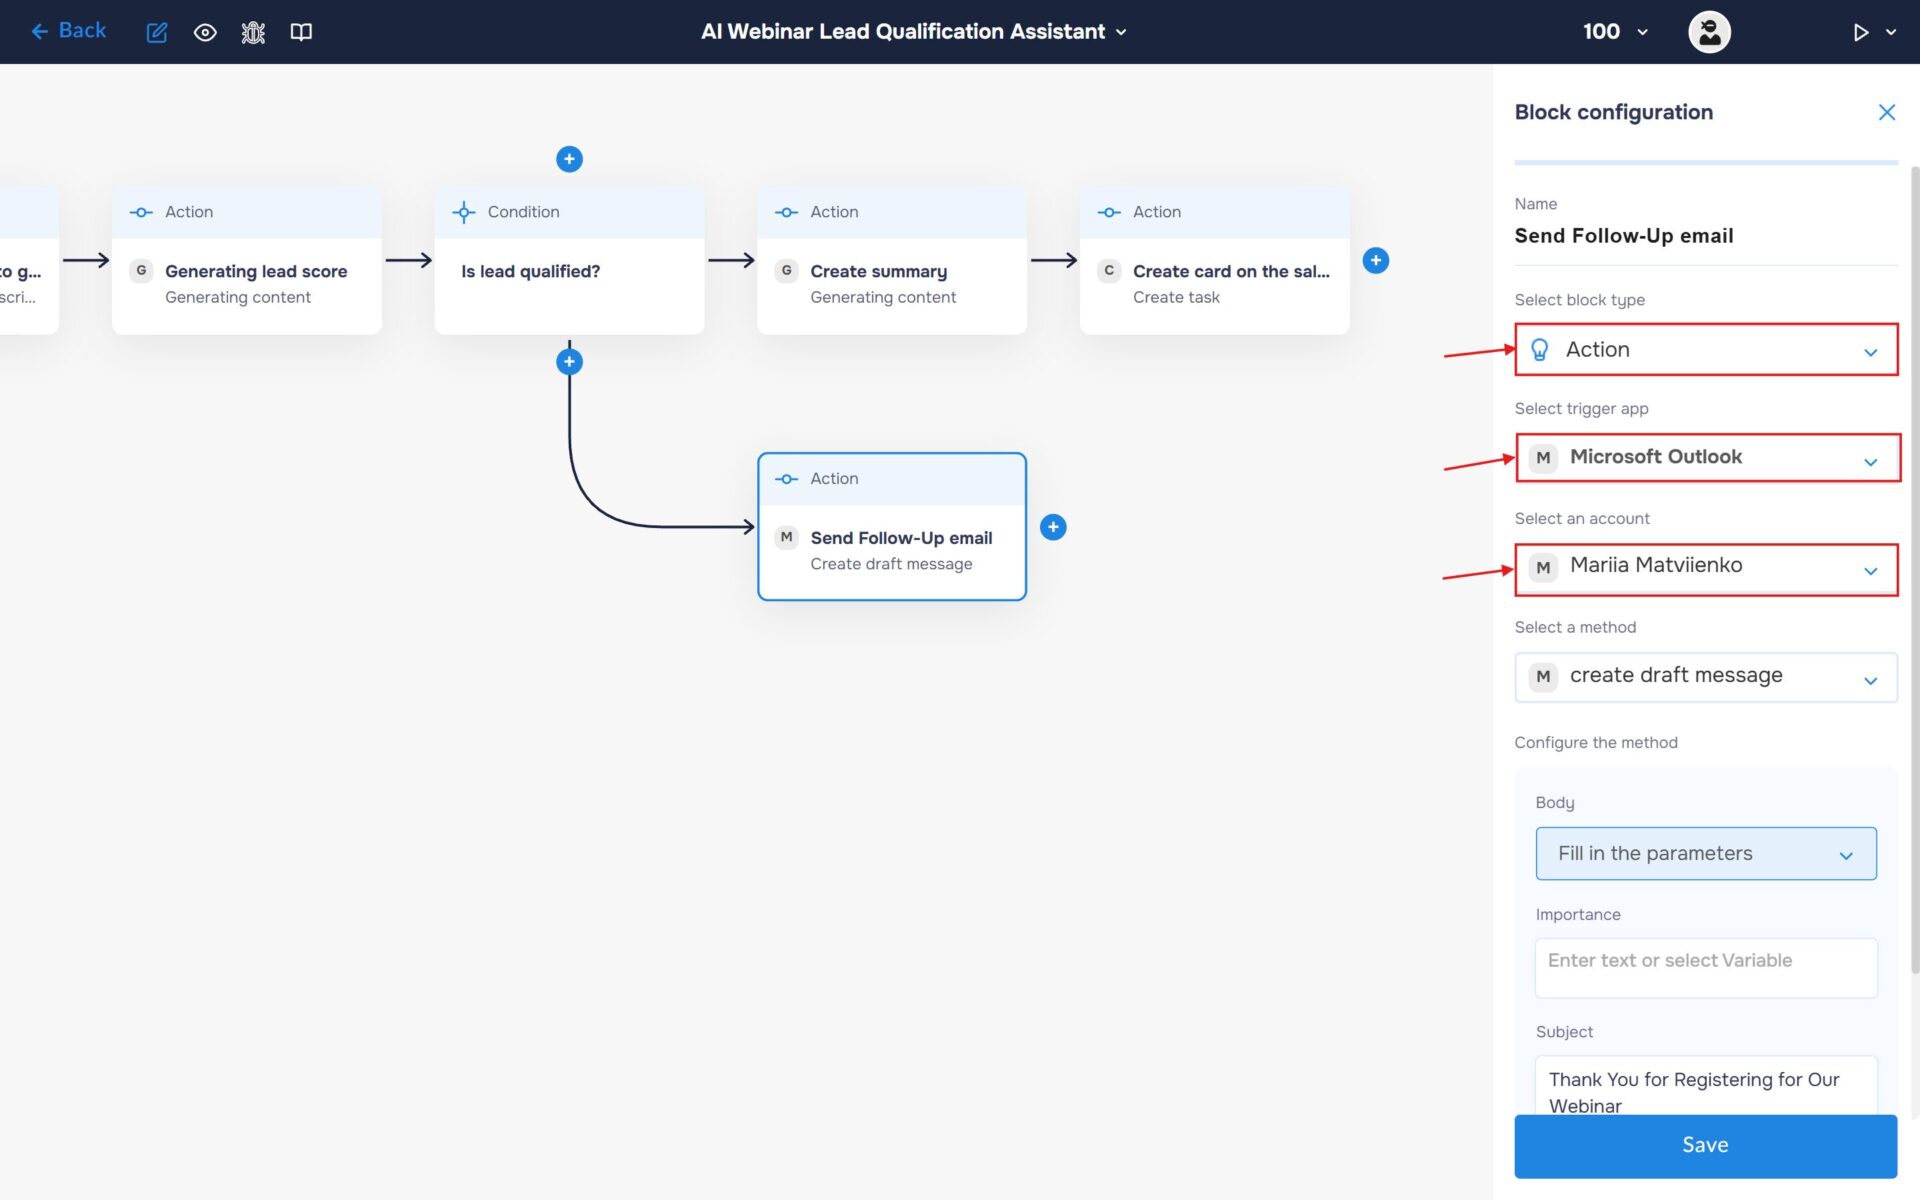
- In the “Block Configuration“ panel, click on the “Select block type“ field and select the “Action” type.
- Next, you need to add Microsoft Outlook service by clicking on the field “Select trigger app“; find and select “Microsoft Outlook“.
- To connect you need to create an authorisation. Click on the “Sign in“ button in the “Select an account“ section.
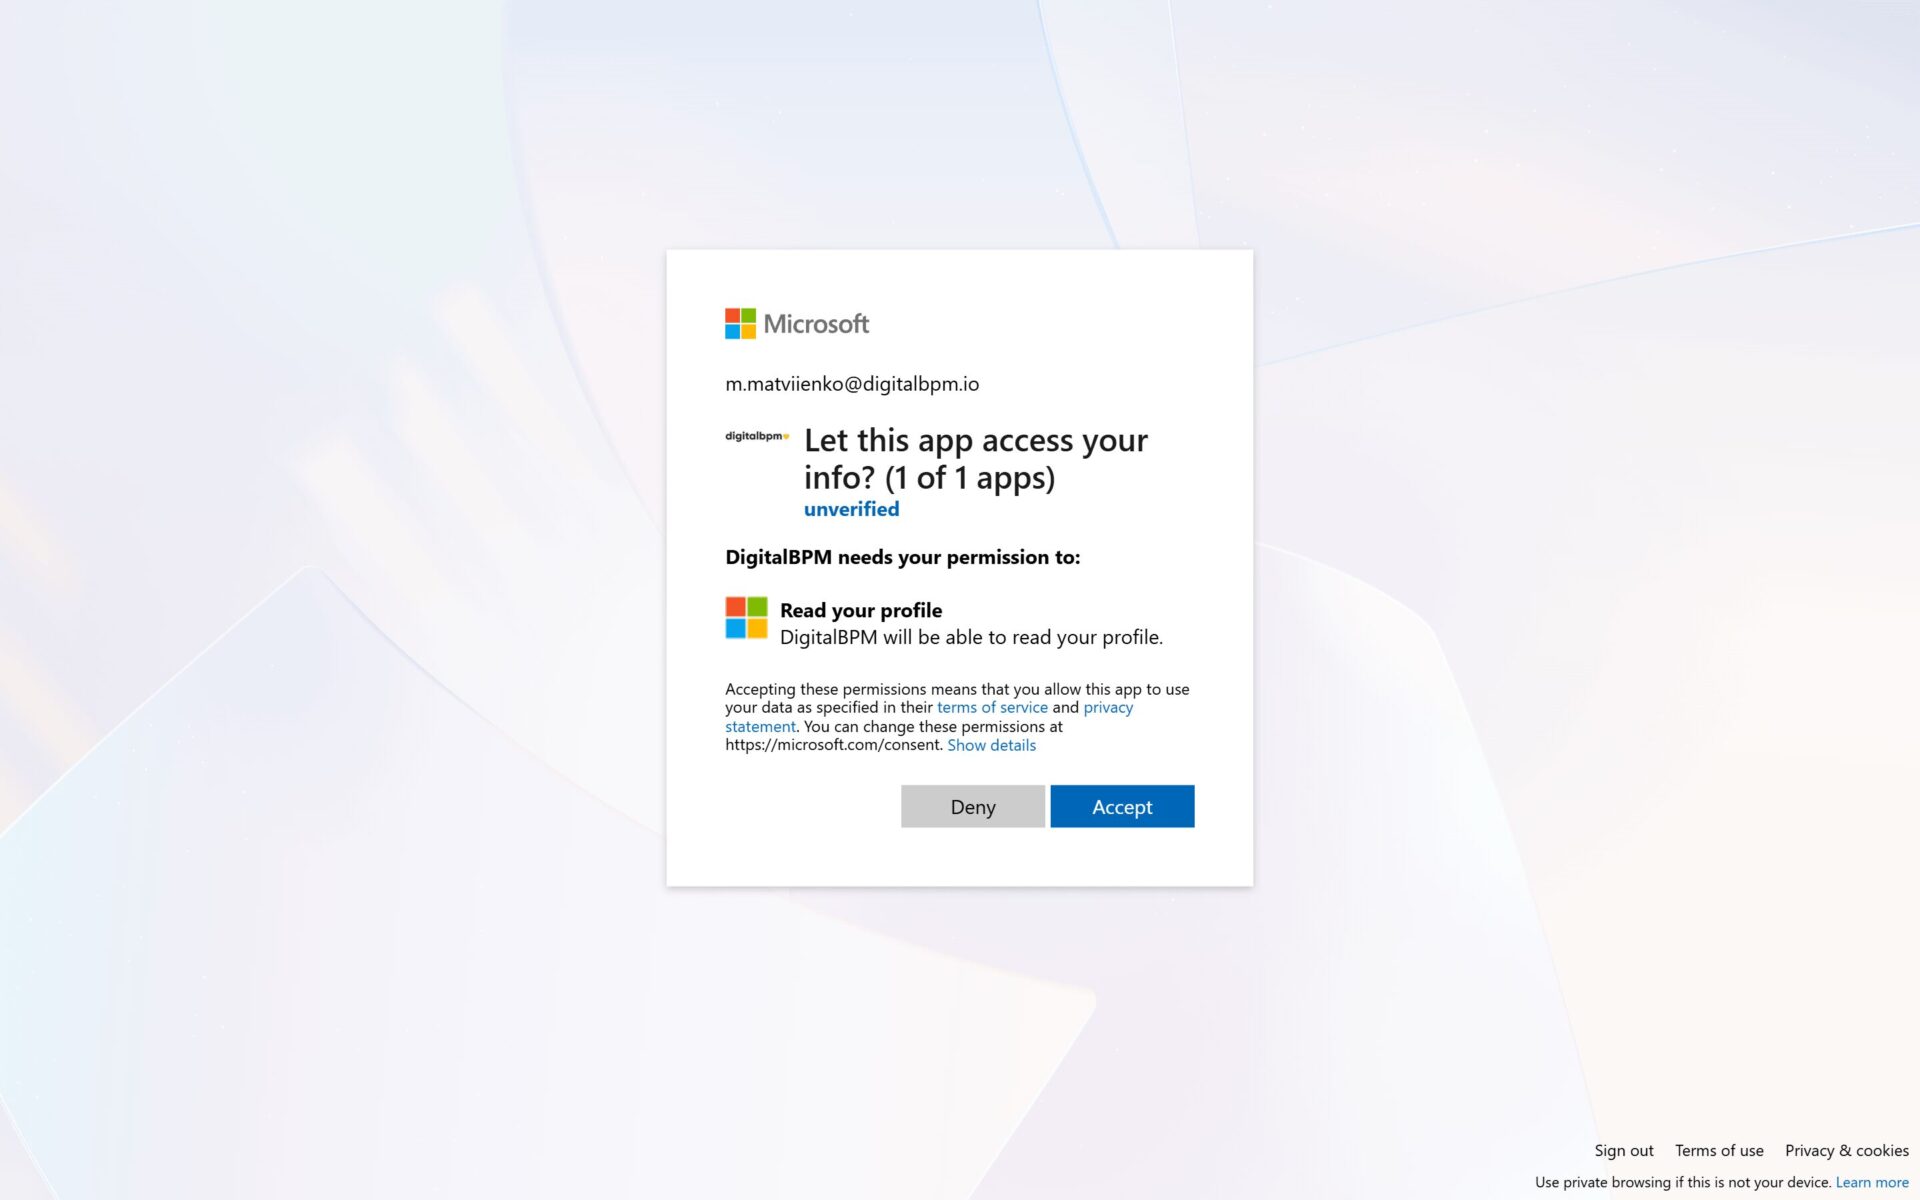
2. Sign in to your Microsoft Outlook account and grant DigitalBPM the required permissions to access your workspace.
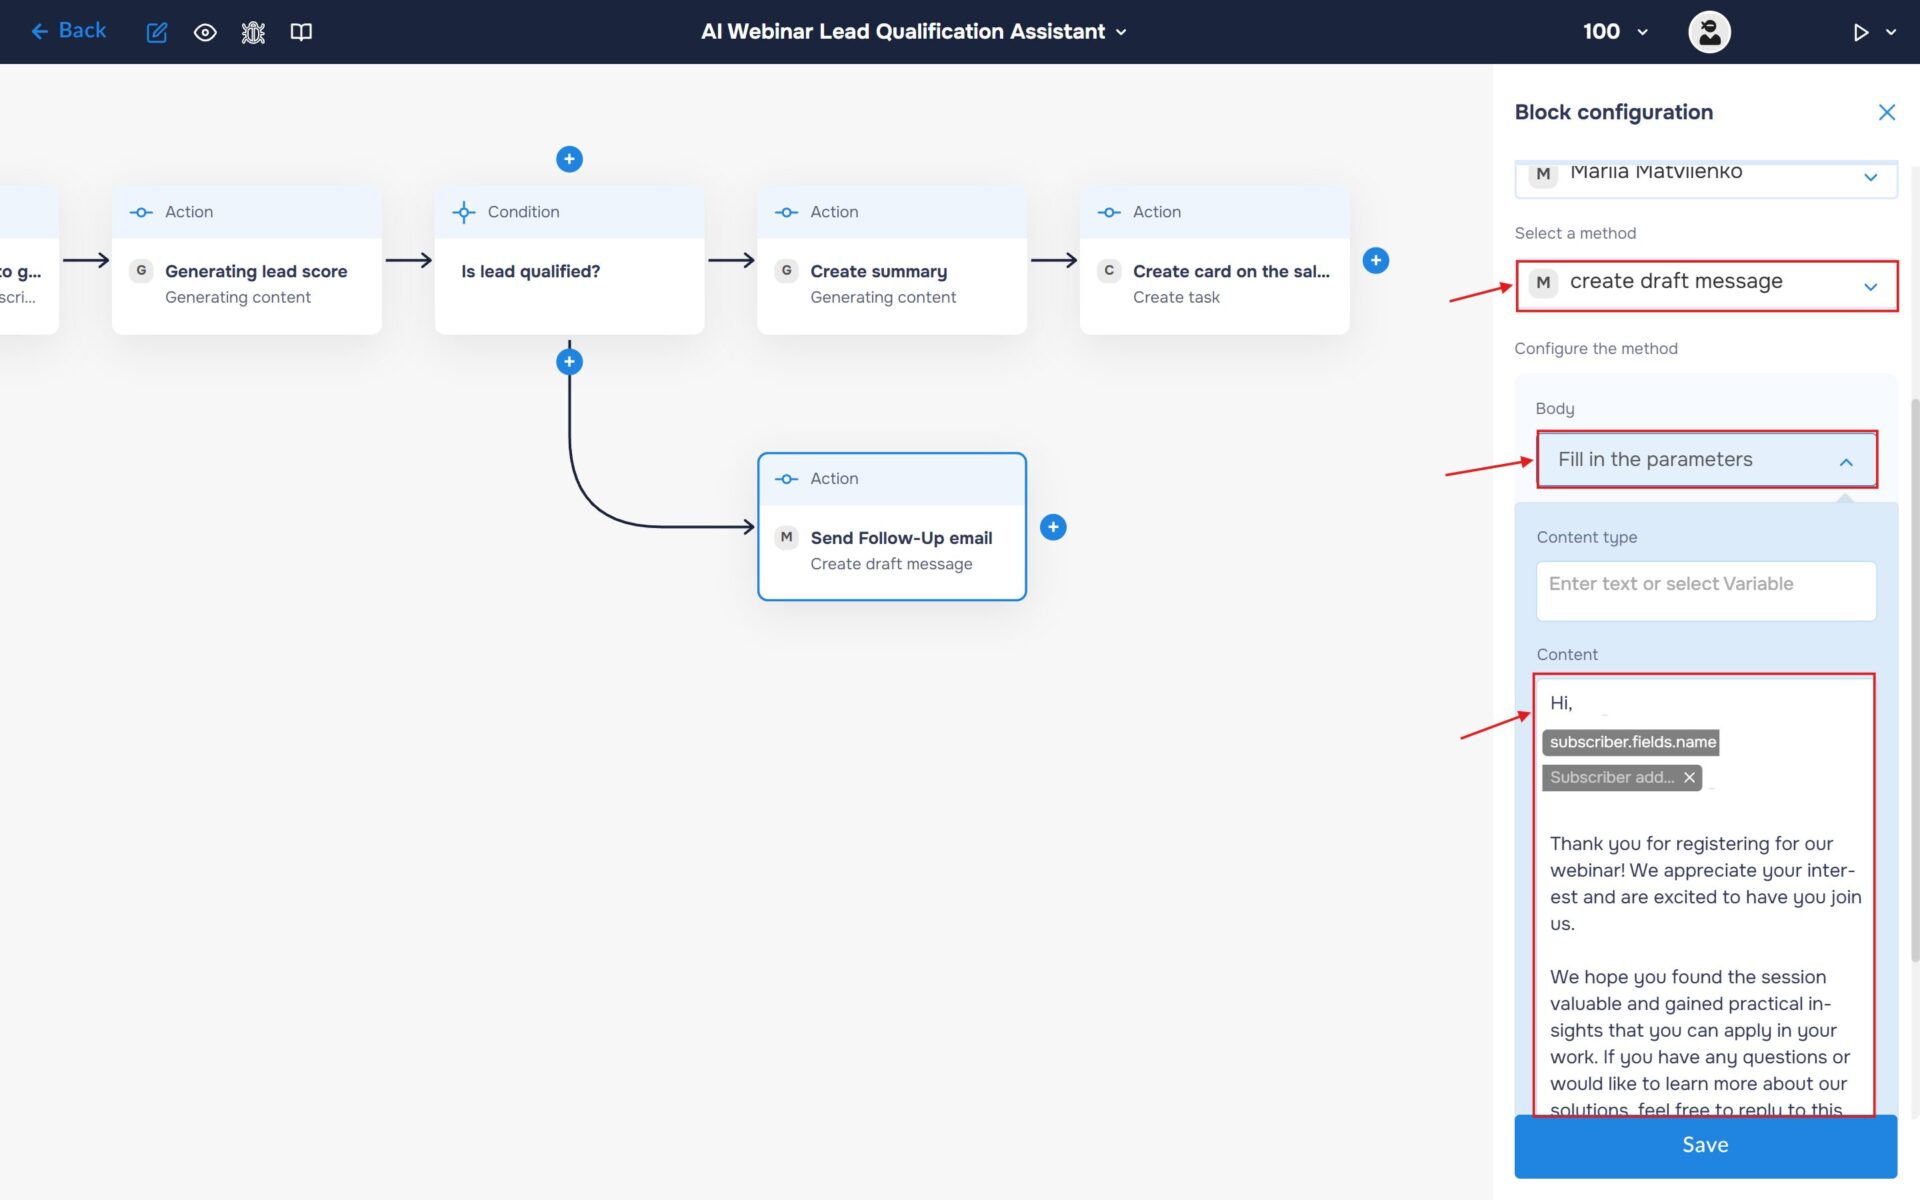
3. The next step is to select a method, so click on the “Select a method“. Find and select the “create draft message” method.
Expand “Fill in the parameters” in the “Body” section and set “Content” to your message.
💡Default message: Hi, {Subscribers Name}
Thank you for registering for our webinar! We appreciate your interest and are excited to have you join us.
We hope you found the session valuable and gained practical insights that you can apply in your work. If you have any questions or would like to learn more about our solutions, feel free to reply to this email—we’ll be happy to help.
In the meantime, stay tuned for more resources, product updates, and future events. We look forward to staying in touch.
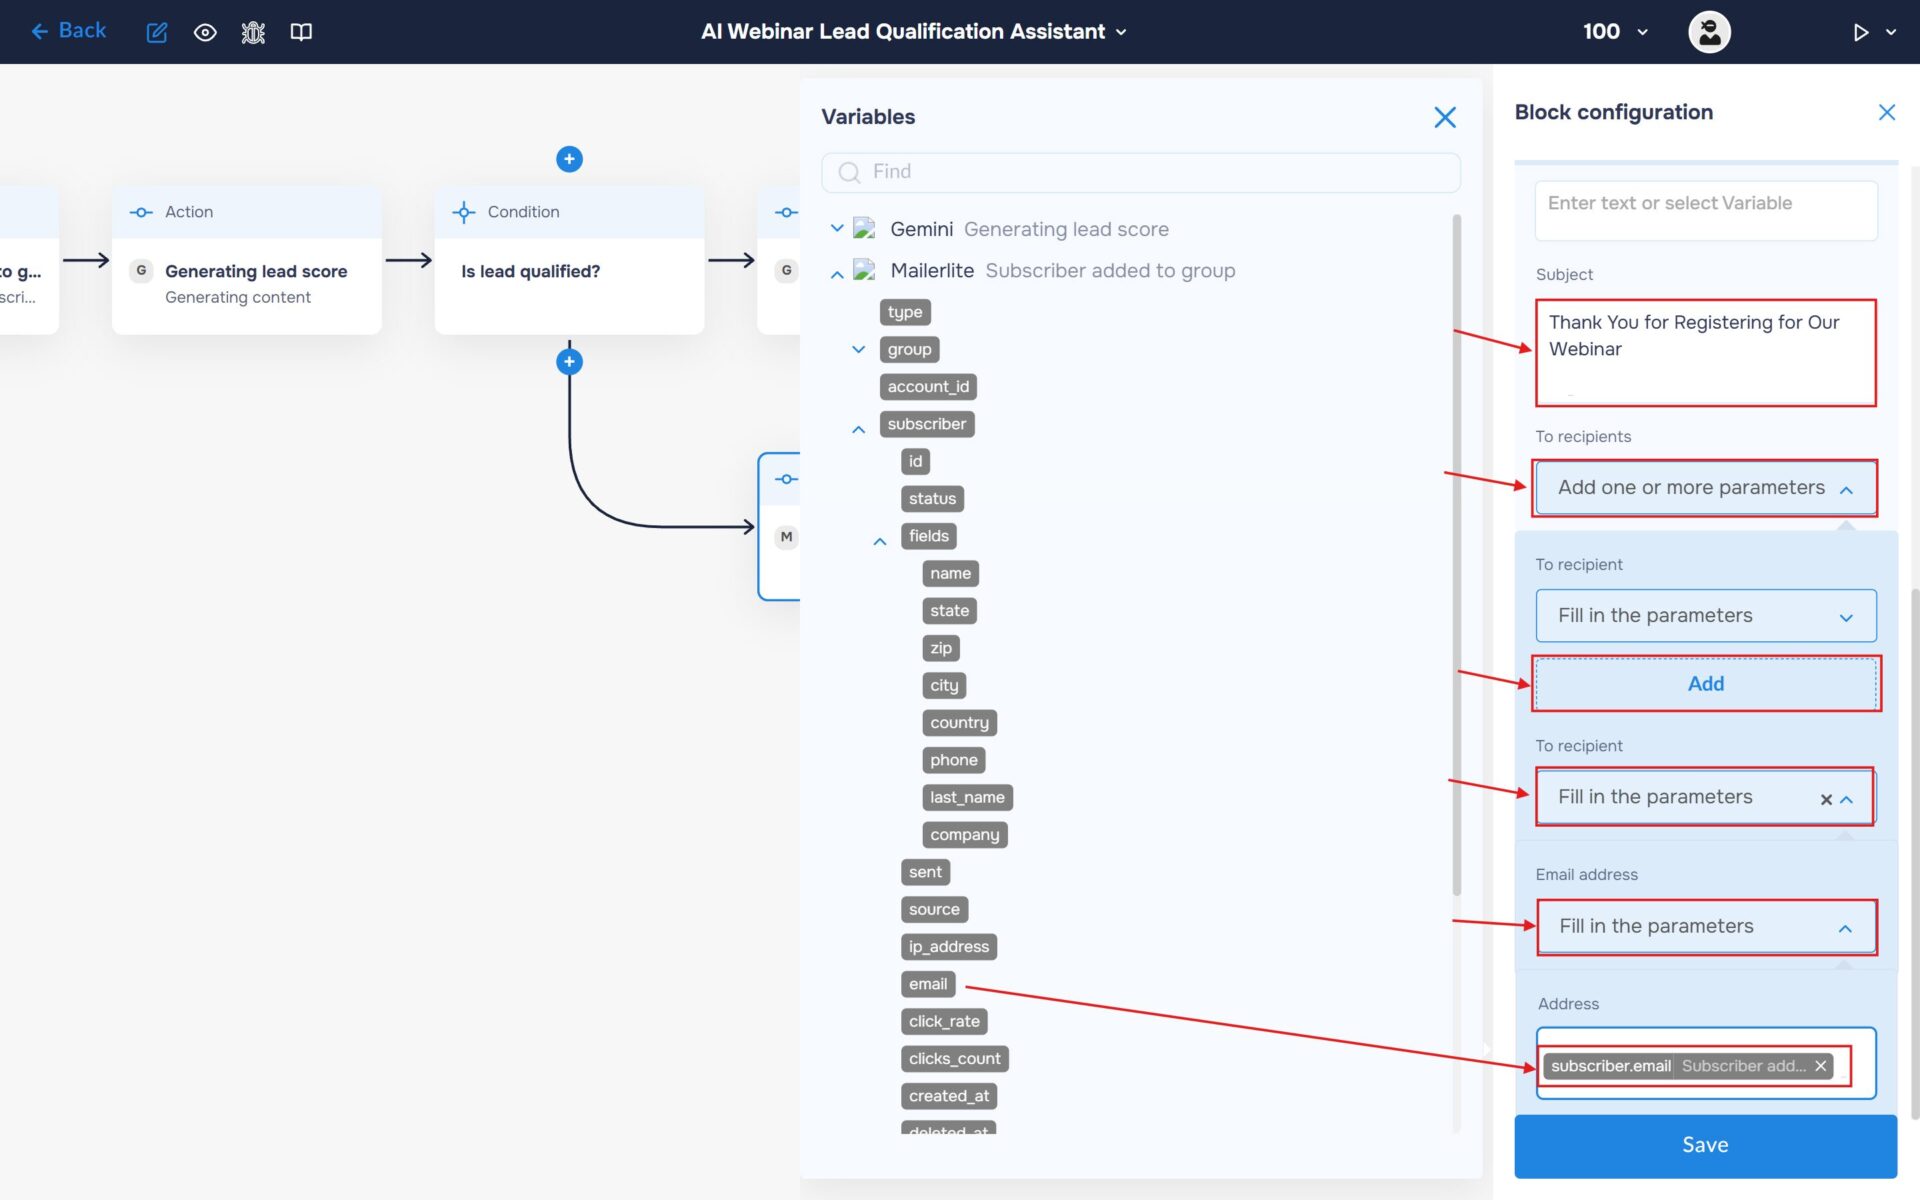
4. Fill “Subject” field with a universal welcome subject line, for example: “Thank You for Registering for Our Webinar”.
In the “To recipients” section, select “Add one or more parameters”. Add “To recipient” object and expand it. Then expand “Email address”. Insert the subscriber’s email address received from the MailerLite webhook.
Run to execute a workflow
1. Your workflow is now fully configured. Let’s try running it. To do this, click the “Run” icon in the top-right corner of the workflow builder and select “Run Live”, or use the keyboard shortcut “Shift+L“. If the launch is successful, the icon color will change from white to blue, and an “L” will appear next to it.
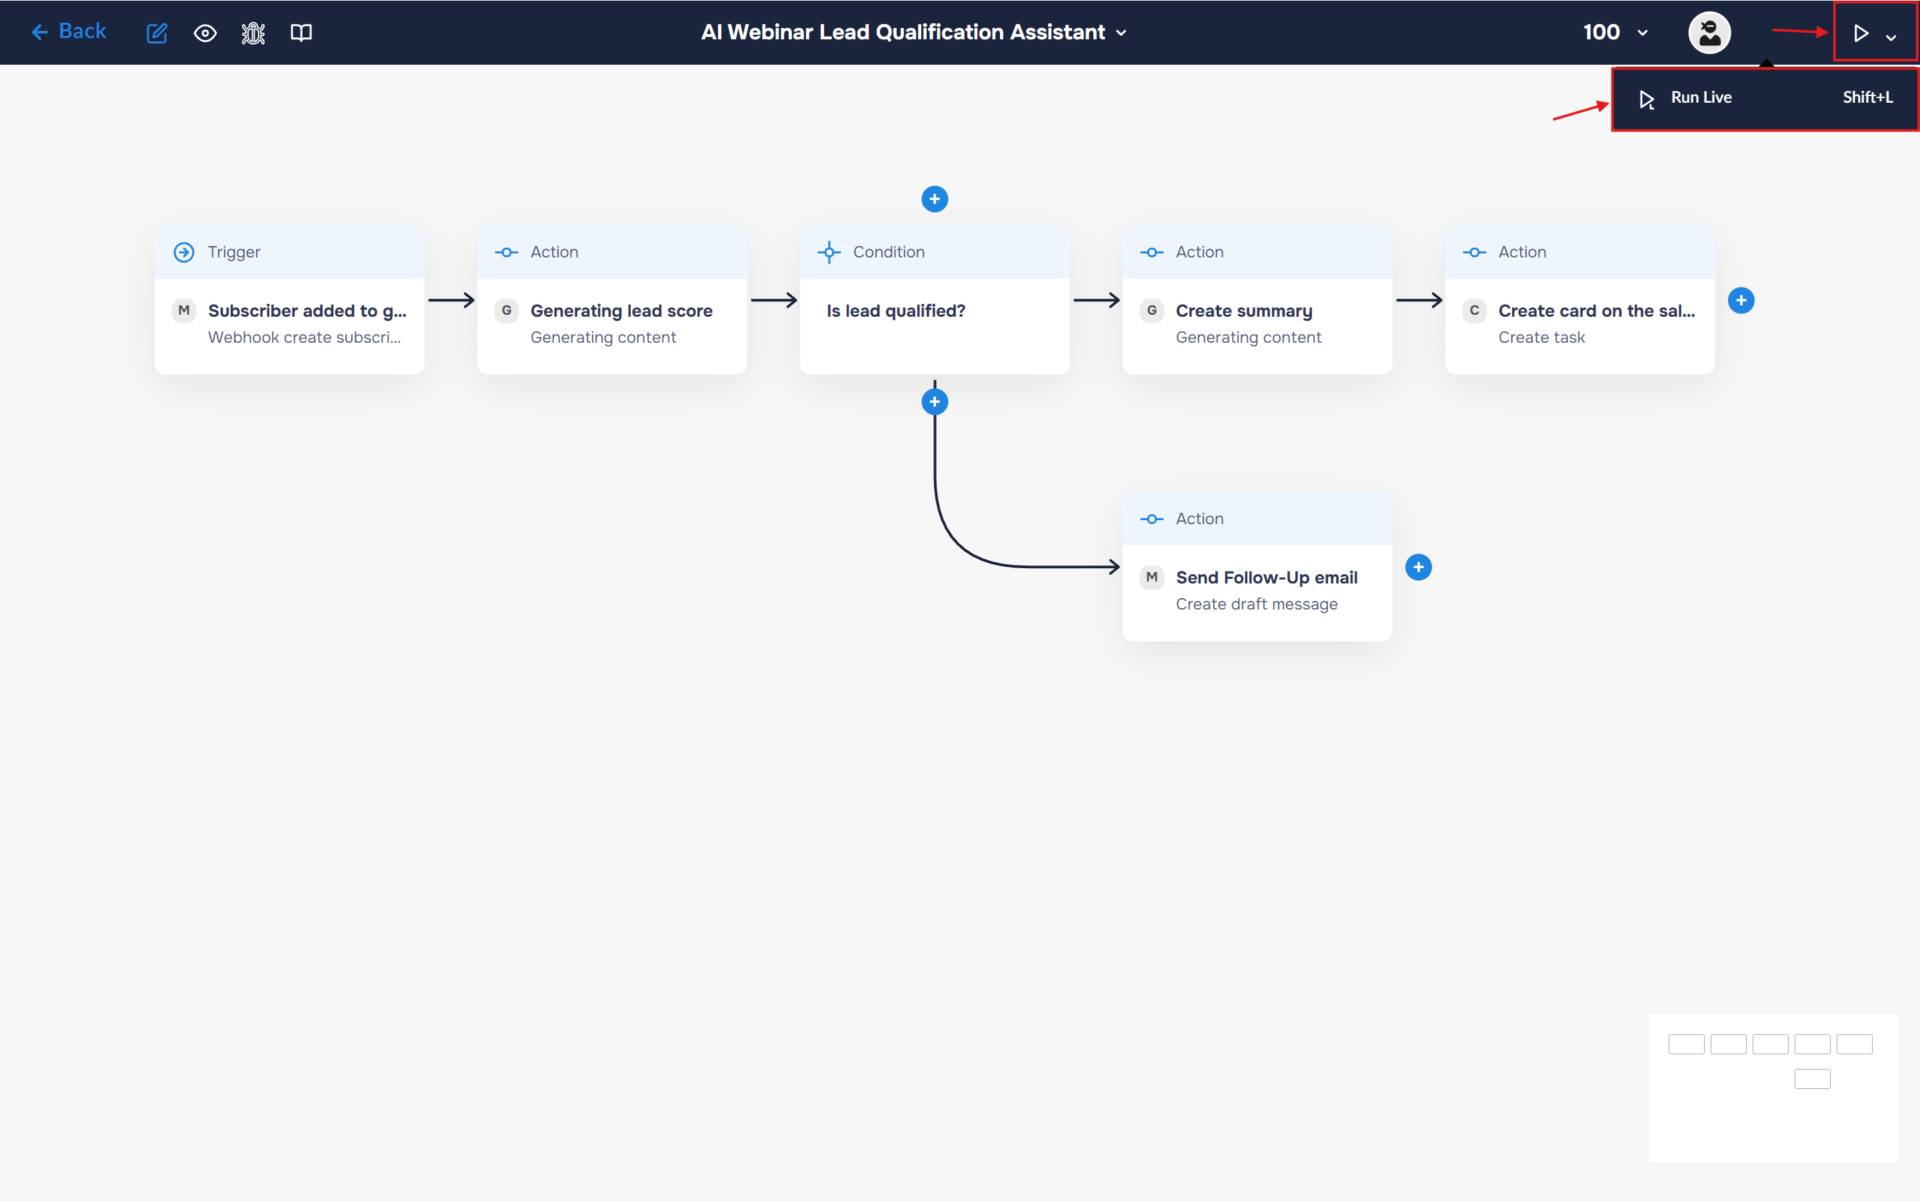
2. Congratulations! You have successfully built an AI-powered webinar lead qualification workflow.
The workflow now automatically evaluates every webinar registration using Gemini AI, assigns a lead score, and creates a ClickUp task for sales-ready prospects, allowing your team to respond quickly while interest is still high.
Lower-priority leads are routed to a separate path, where the workflow creates a follow-up email draft in Microsoft Outlook. This keeps potential customers engaged without requiring immediate sales involvement and gives your team full control over outbound communication before any message is sent.